
Chinese Thread Book Part 2: Further Instructions and Dragon Books
Thanks to someone who saw my first post on thread books, I was able to get an email address for Ruth Smith (eruthsmith@btinternet.com) and contact her about her books. She has four different instruction booklets for making different types of projects. I ordered books 1 and 3, and have been working with them for the past month or so. After reading her instructions for making the basic book, I realized my version was pretty accurate in its layout, but small compared to the traditional version, and also that I was making the box construction a little more complicated than it needed to be. The rectangular boxes have single thickness walls, the square boxes are made by cutting and pasting (as opposed to my origami version), and the pop up boxes are made by folding a flat, rectangular piece of paper. So basically, get out your scissors and glue stick! Of course you can make your book any size you like. Keep in mind every box unit needs to be consistent, i.e., square boxes are the same width as the rectangular ones they sit on top of.
I encourage you to contact Ruth if you want the complete set of instructions. Her booklets are very clear and easy to follow. I also found a tutorial for making the pop up box with scissors and glue. You can see it here. No matter which pop up version you use, the more carefully you make your folds the better the box will turn out.
In book 3 Ruth provides instructions for making a Dragon Book with 19 compartments. These are called dragon books because they are traditionally decorated with drawings of dragons. The idea is similar to the standard thread book, but the base of the book is formed by three large, overlapping boxes which then fold out to reveal rectangular boxes and pop up boxes. Here’s a set of photos showing my completed book.
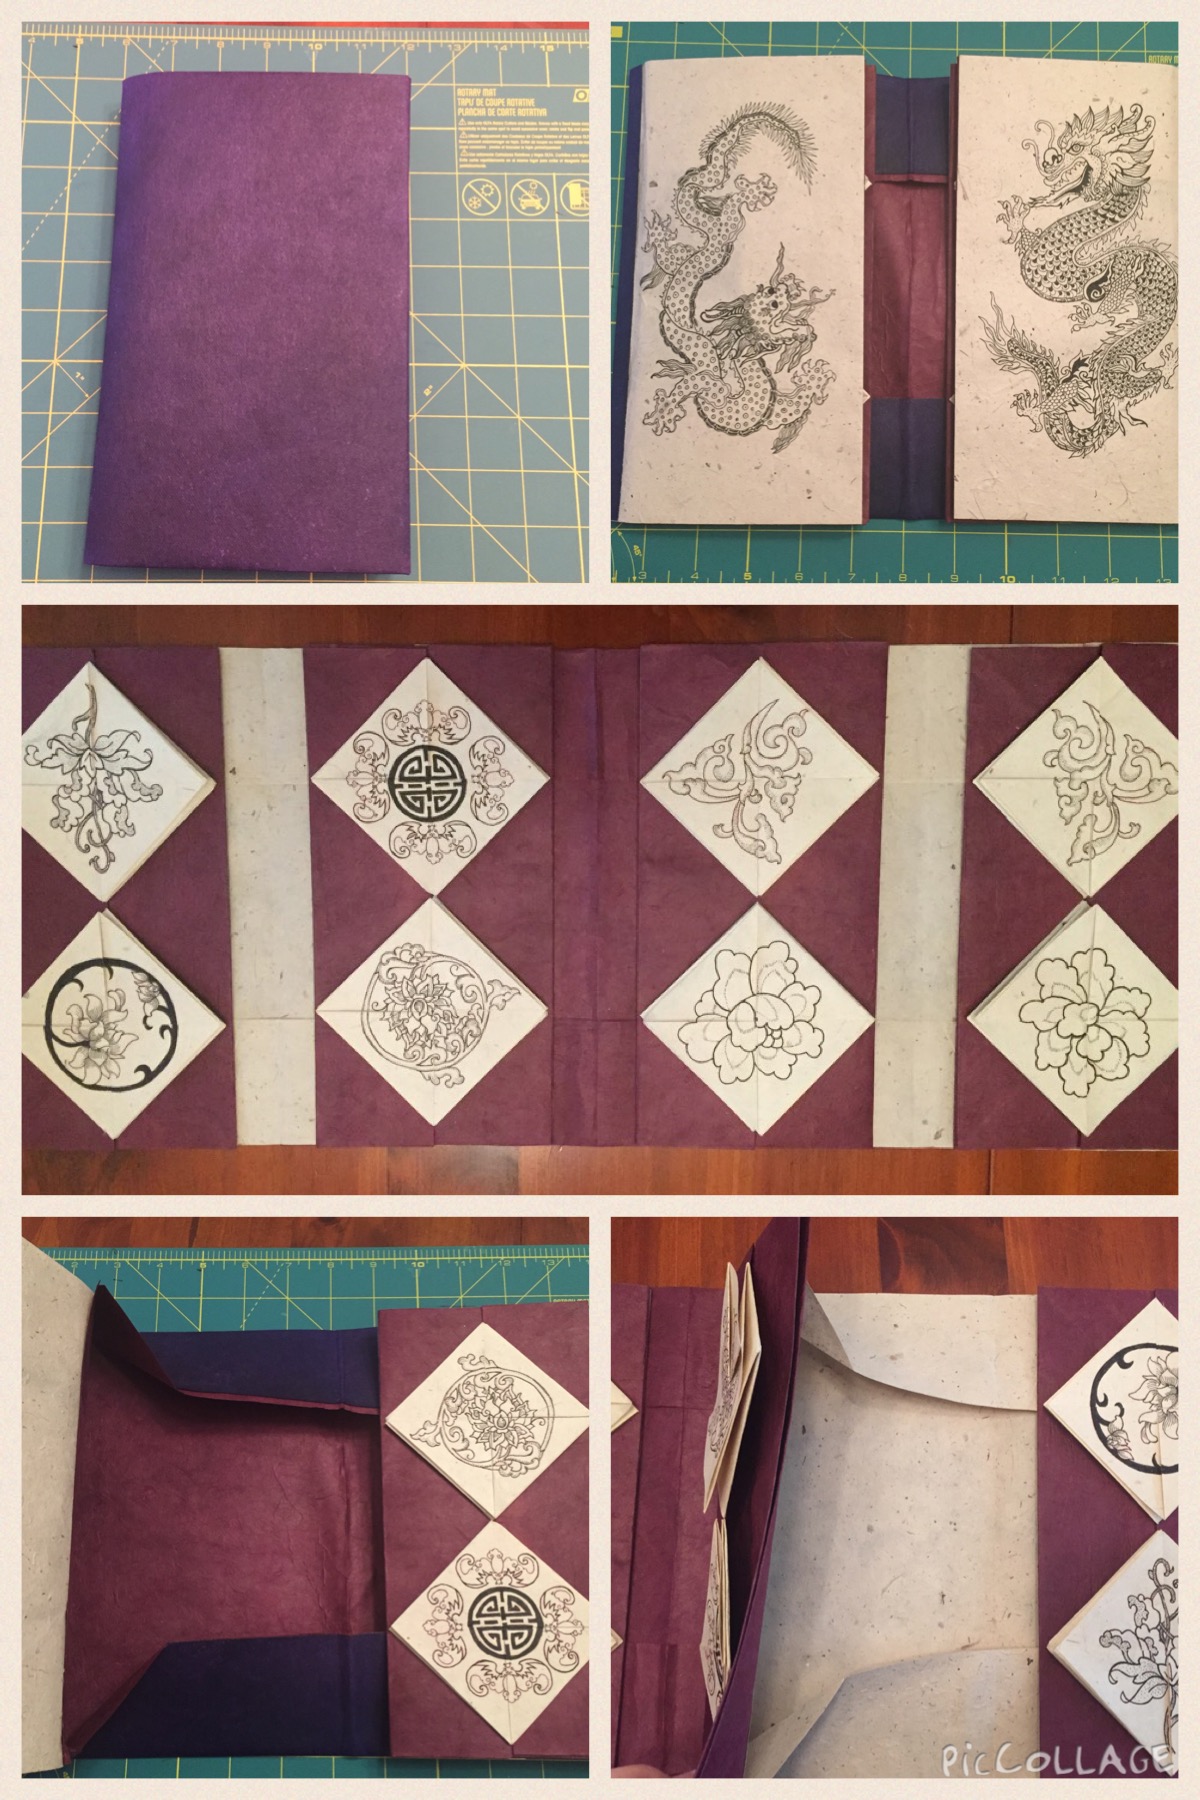
And here’s a close up photo of the book opened to the dragon boxes.
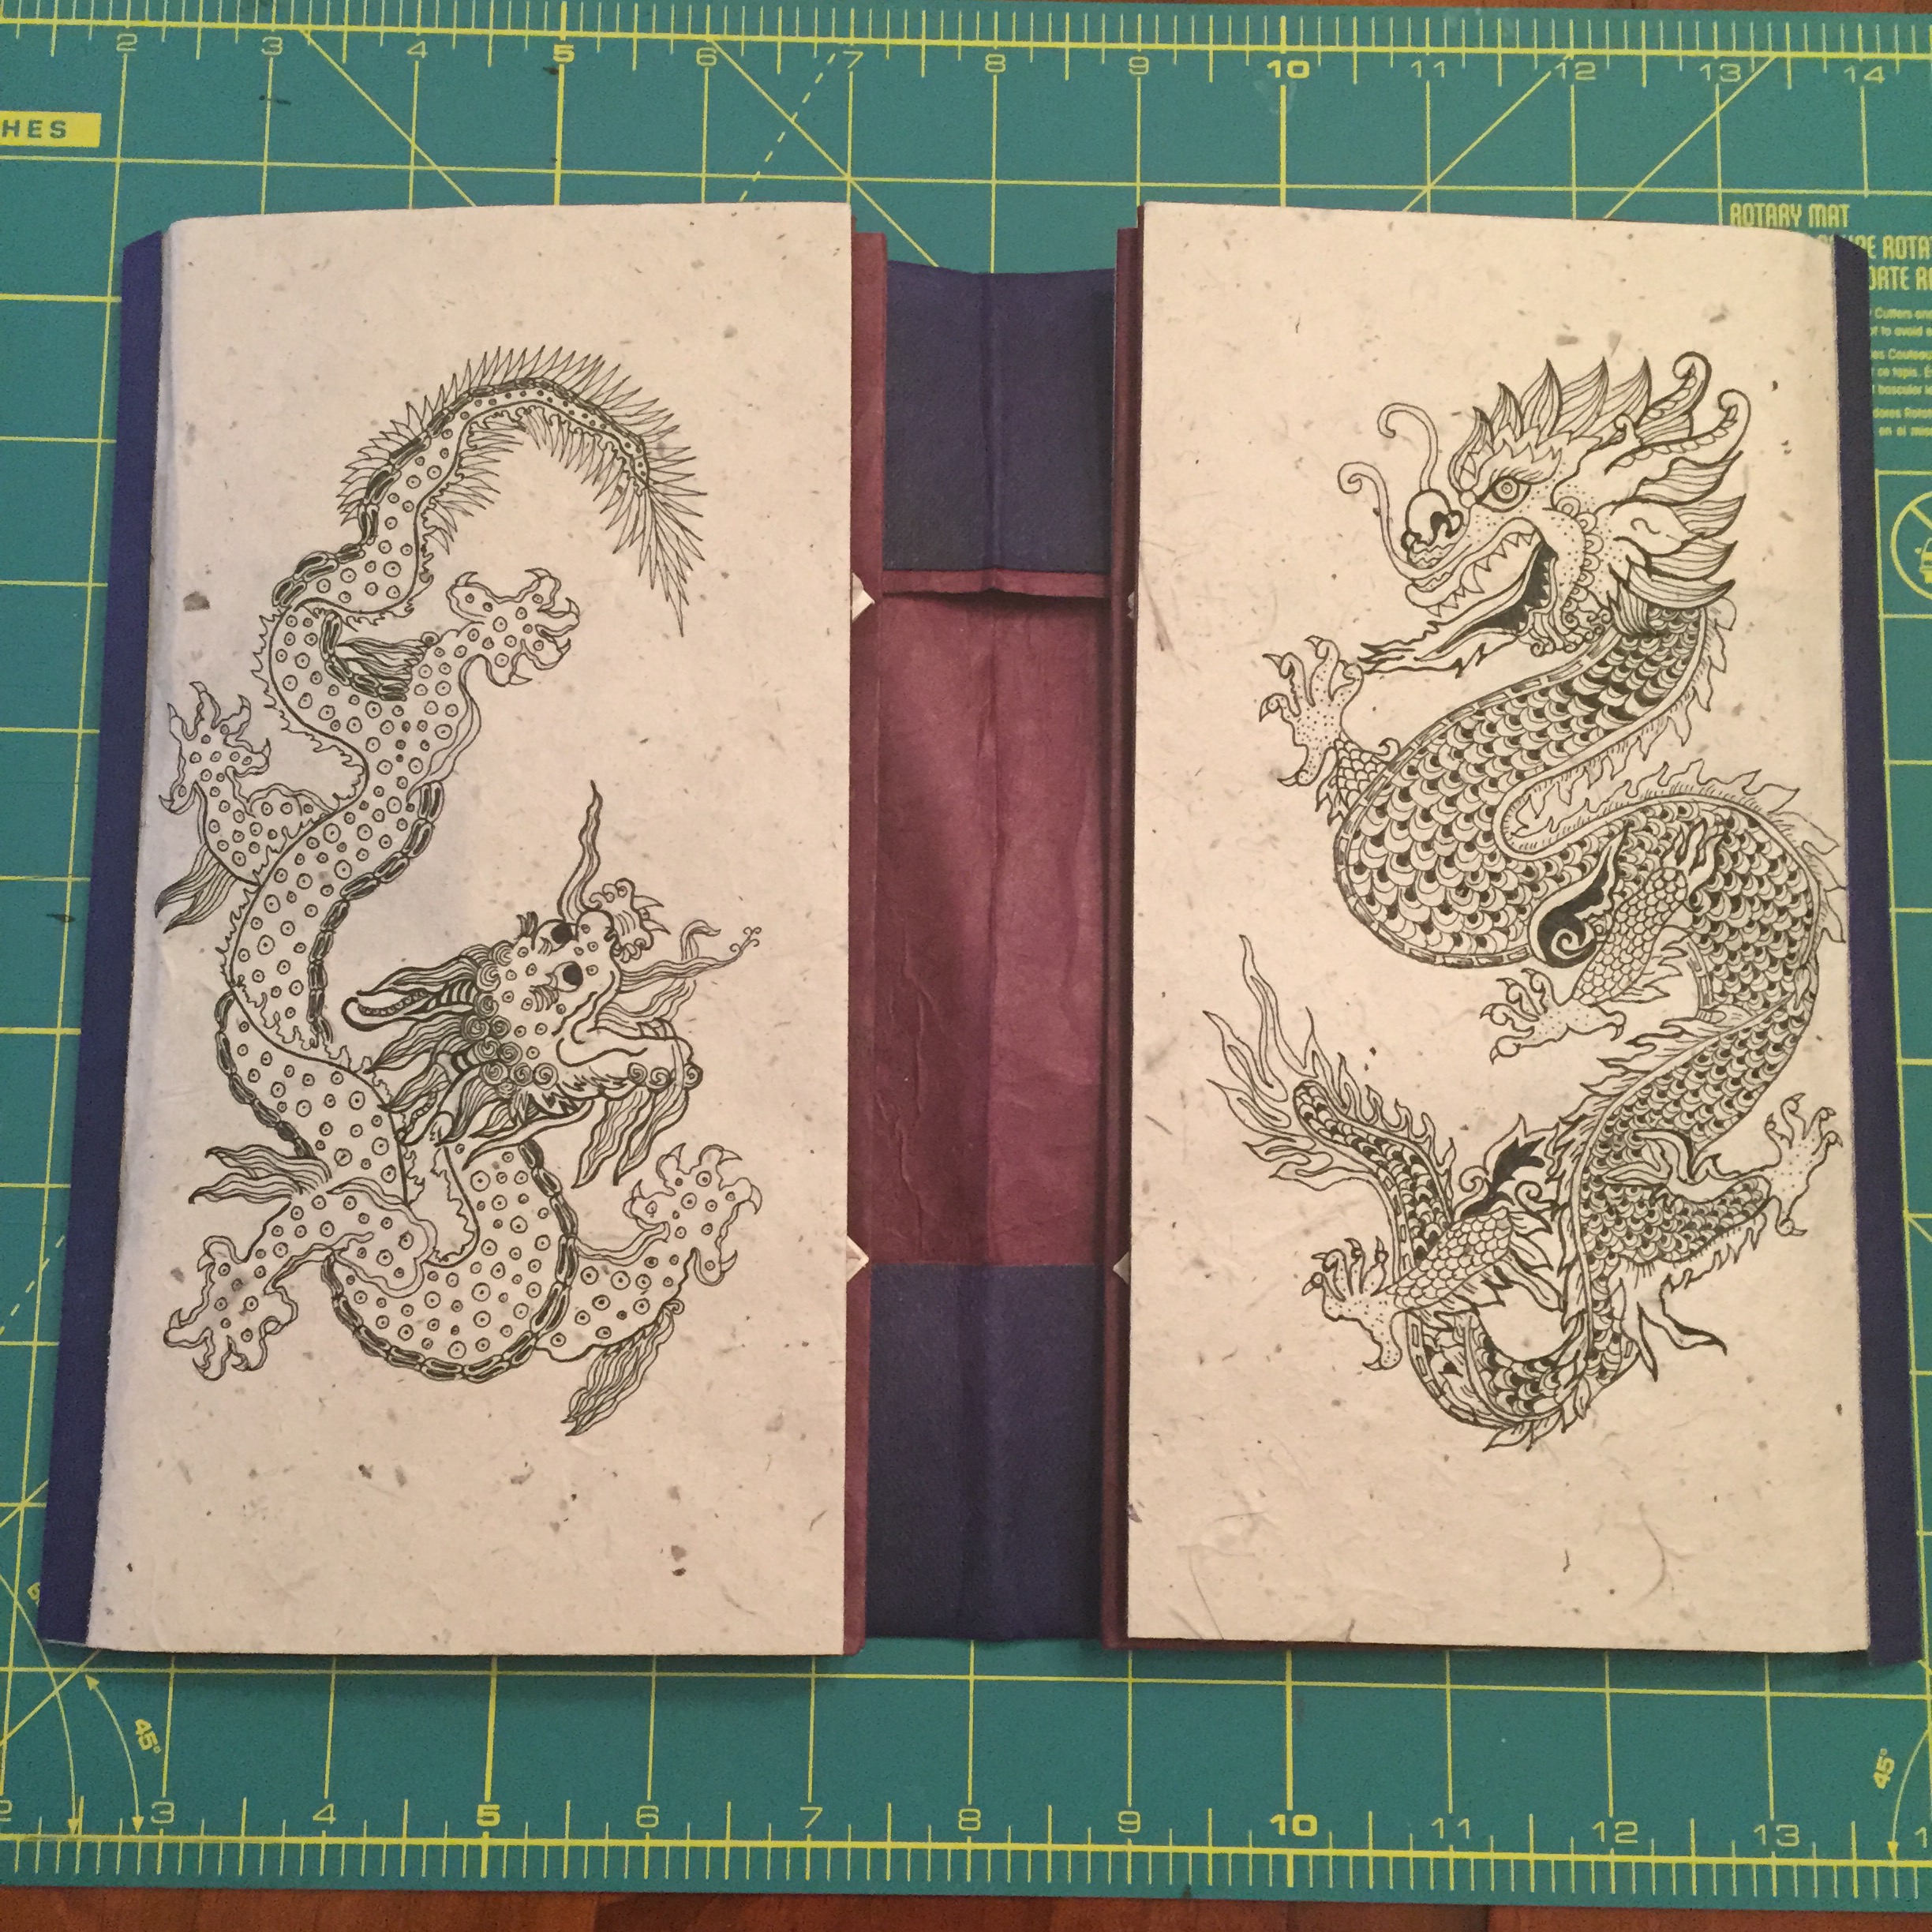
As you can see, I decided to try out a bunch of different Chinese motifs to decorate my pop up boxes. Now that I have this sampler I can use the designs for future books. I have been using Kraft-Tex paper to make my book covers because I like its durability. In this case it may be a bit too stiff as some of the base boxes are hard to open fully, but I’m hoping this will improve with use.
Once you have the basics of thread book construction there is really a lot of room to make different versions by changing the size and number of boxes. I think I’ll try a mini book next! As always, free to contact me if you have any questions.
The Joys of Moving and Chinese Thread Books
The past year I have been preparing to move. Eventually this will result in a new and improved studio space, but in the mean time it has meant a lot of time spent packing and downsizing. Really, you have no idea of how many art supplies you have until you have to pack them all into boxes. The uncertainty surrounding my living situation has made me reluctant to undertake any major new pieces. Finally, however, I am relocated into temporary housing so things are stable for the near future. Unfortunately things are also a little disorganized (I know I have a circle template somewhere, if only I could find it). As a result, I am moving forward with small projects for the time being.
I blame Pinterest for my latest undertaking. During a packing break I found something called a Chinese Thread Book on a bookmaking board I follow. This ingenious creation is a little paper notebook made of layered unfolding pockets. You can see one in action in this short YouTube video. I really wanted to make one for myself, but none of the references I found included any instructions. My research found the expert on the booklets, Ruth Smith author of several books on Chinese embroidery, teaches workshops in Great Britain, but that doesn’t help me much. So I embarked on a weeklong obsessive program of folding paper boxes until I came up with my version of the thread book. I make no claim to authenticity, but it was a satisfying project, and it is a lot of fun to open all those little paper pockets.
Here’s how i did it:
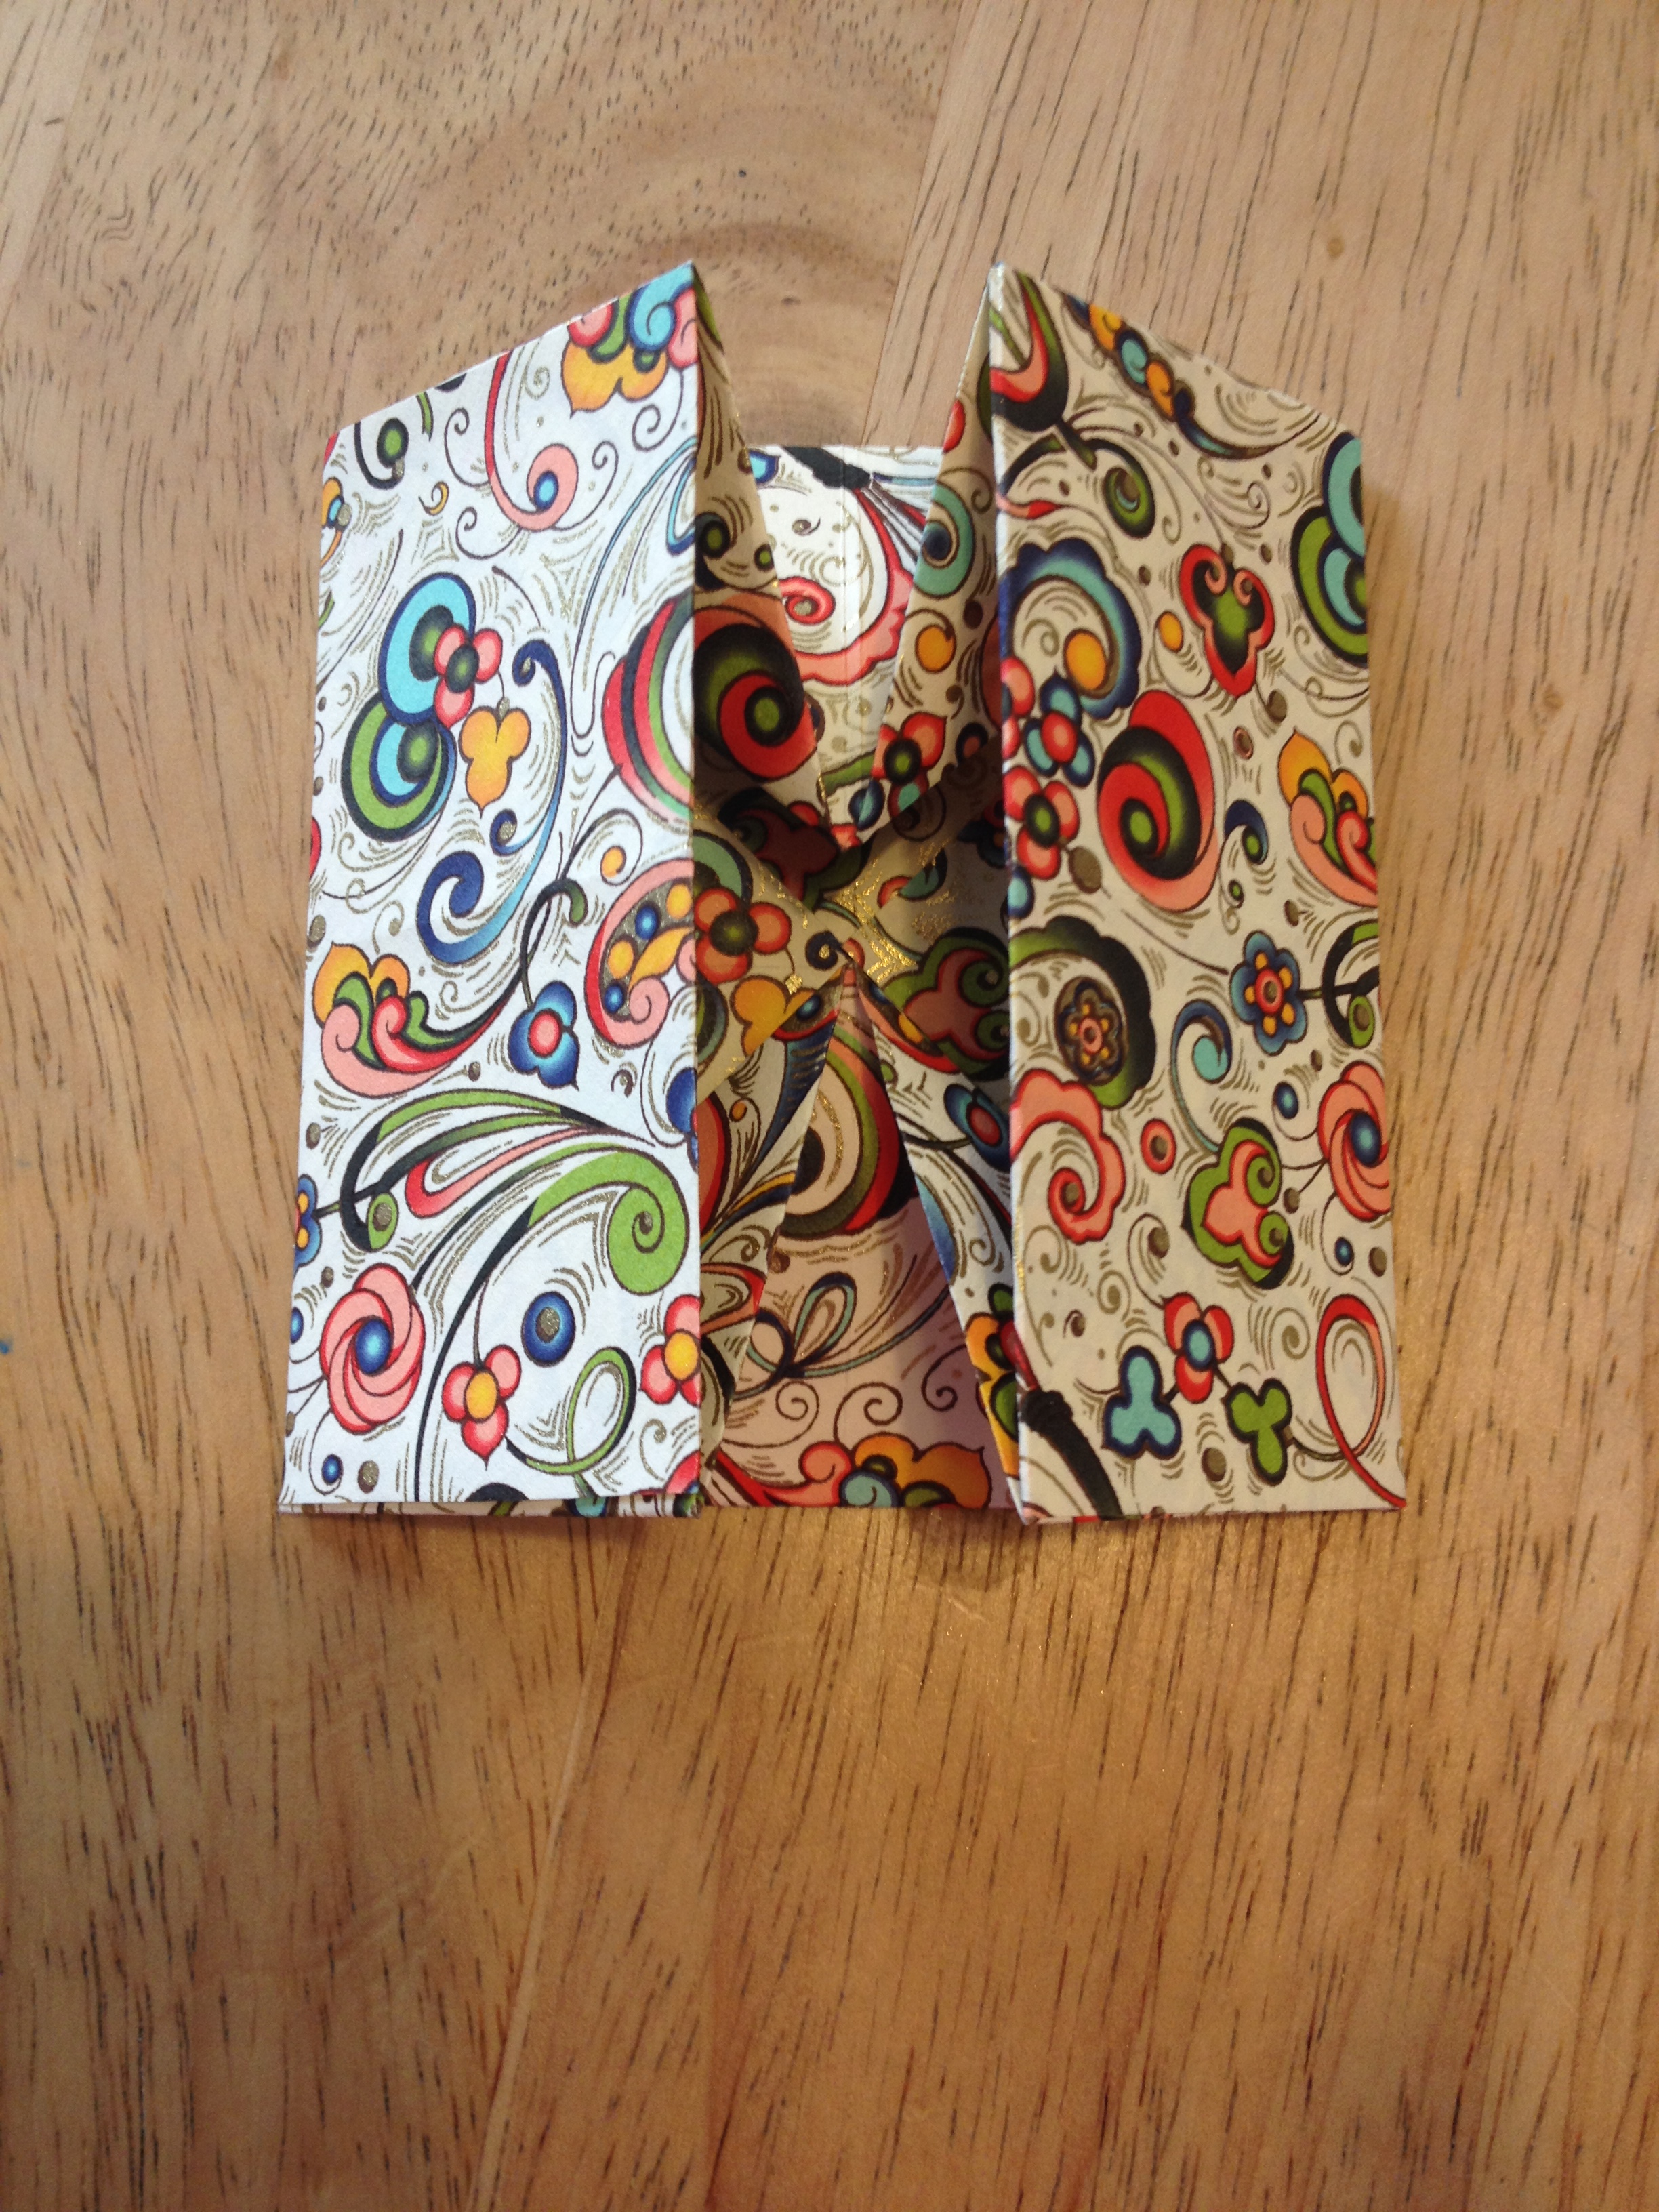
The first layer of the book is something called an Origami magic box (magic because it transforms from flat square to pop up cube). I learned to make one from this tutorial. If I can figure this out, so can you. I recommend taking your time with the folds and practicing. Now that I’ve made a few dozen I’m almost good at it. Here’s the box folded flat.
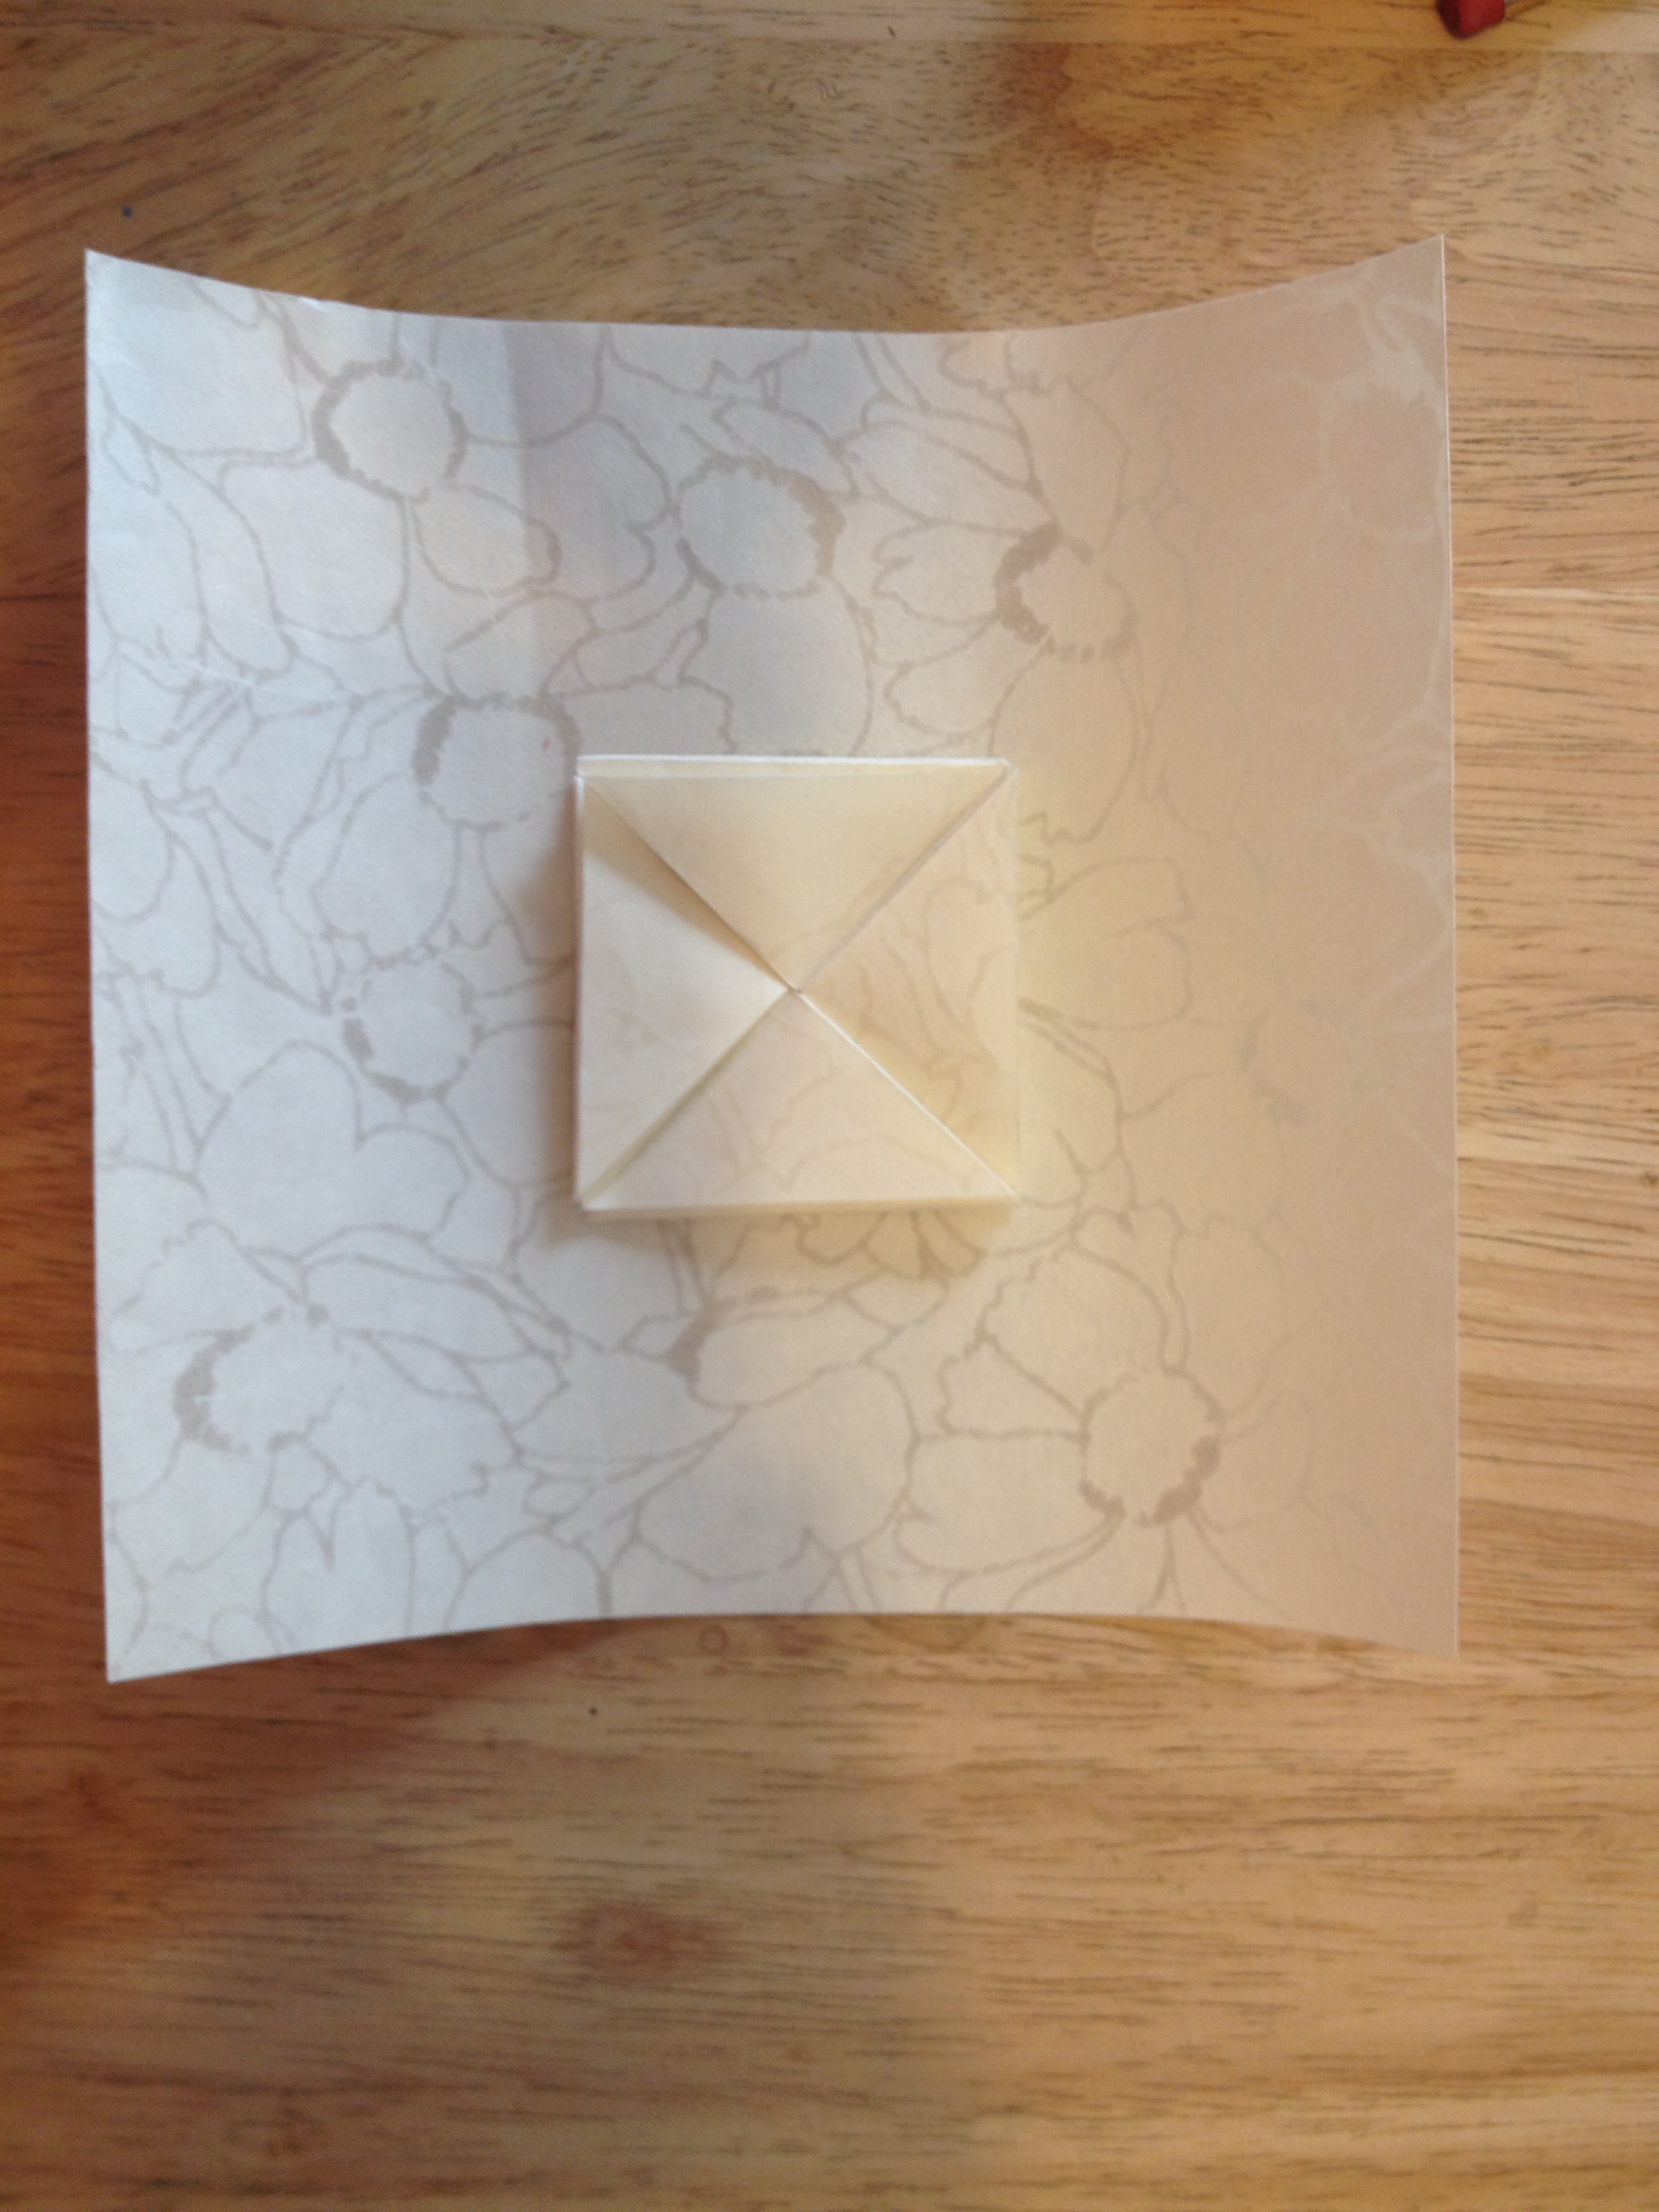

Magic Box Unfolded
I made four magic boxes for my book. The next layer of the book is a simple origami box. There are lots of tutorials for the square box. I like this one. If you would rather make a box using cut and paste methods, this tutorial will show you how.
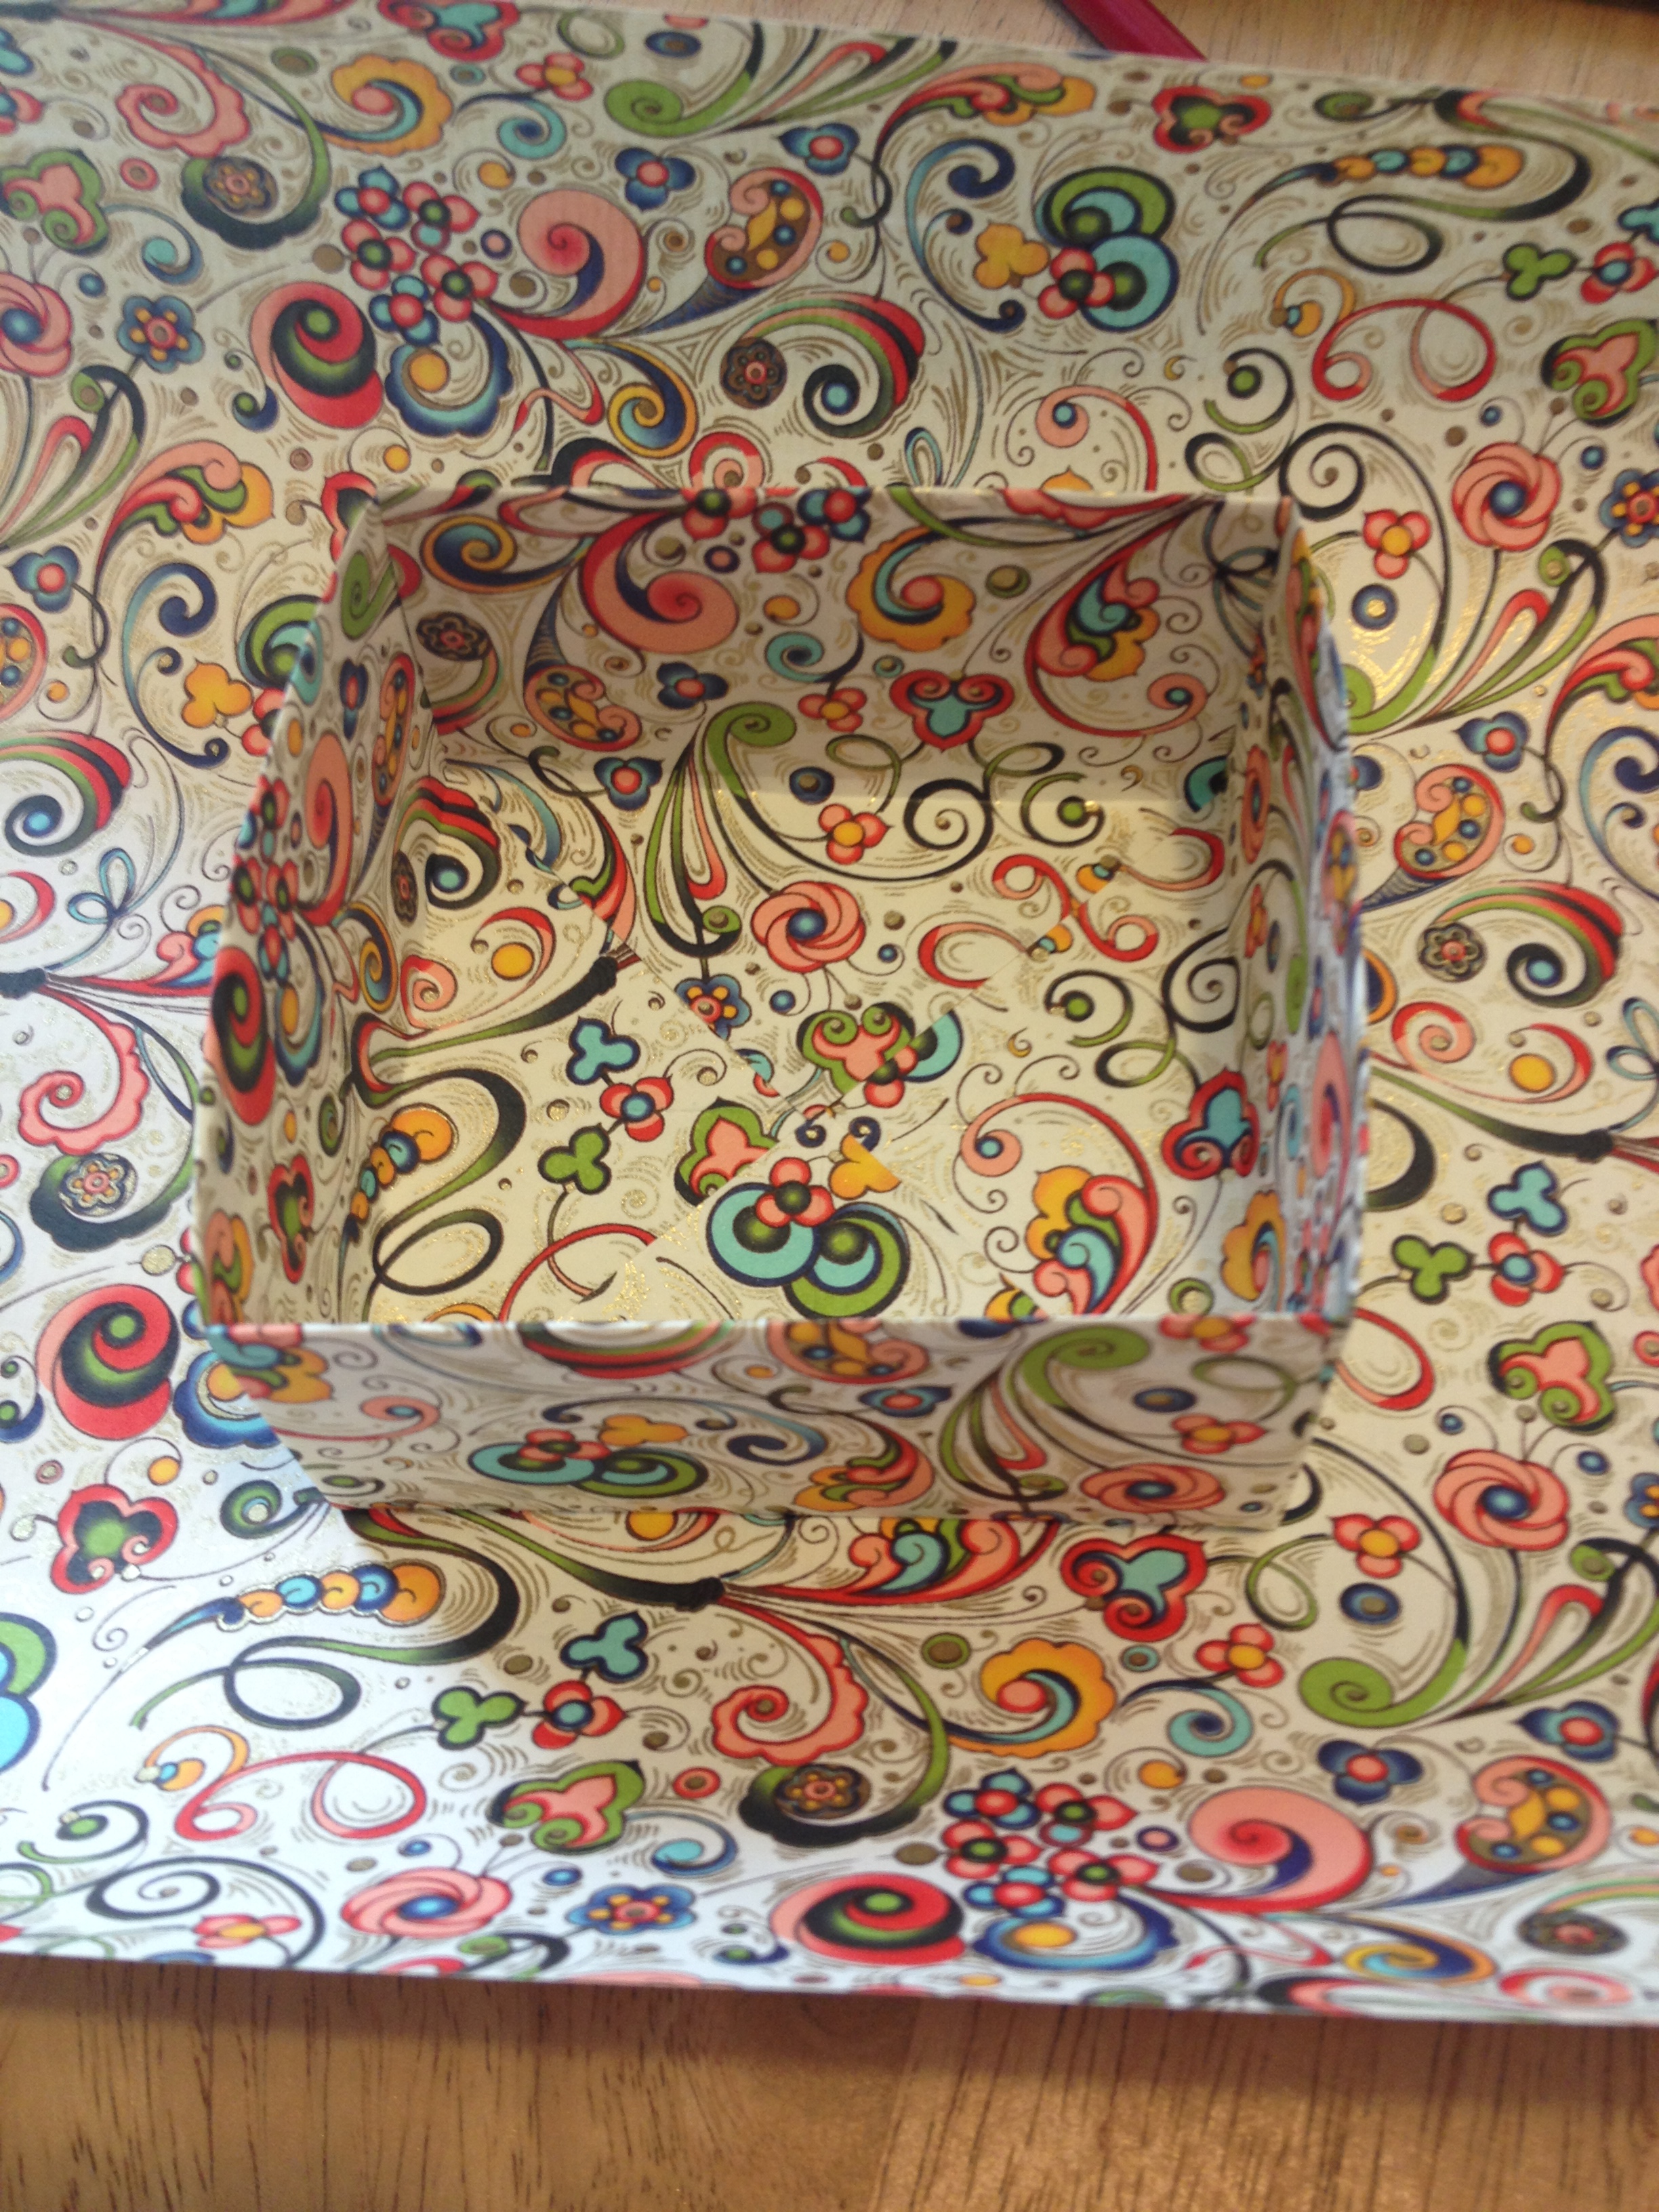
square box
Again, you need to make four of them. In order for the thread book to fold flat you need to flatten your square boxes. They should look like this:
origami box folded flat
The next step is to line the square boxes. I like to use contrasting paper so you get a little surprise when you open them. Cut a lining big enough to cover the bottom of the box plus one side wall. Finish with a triangular flap for the top. You will attach the magic box to this later. Here’s a picture of the box with its lining. Make sure you insert the lining so the triangular flap extends as shown in the second photo below.

square box with lining
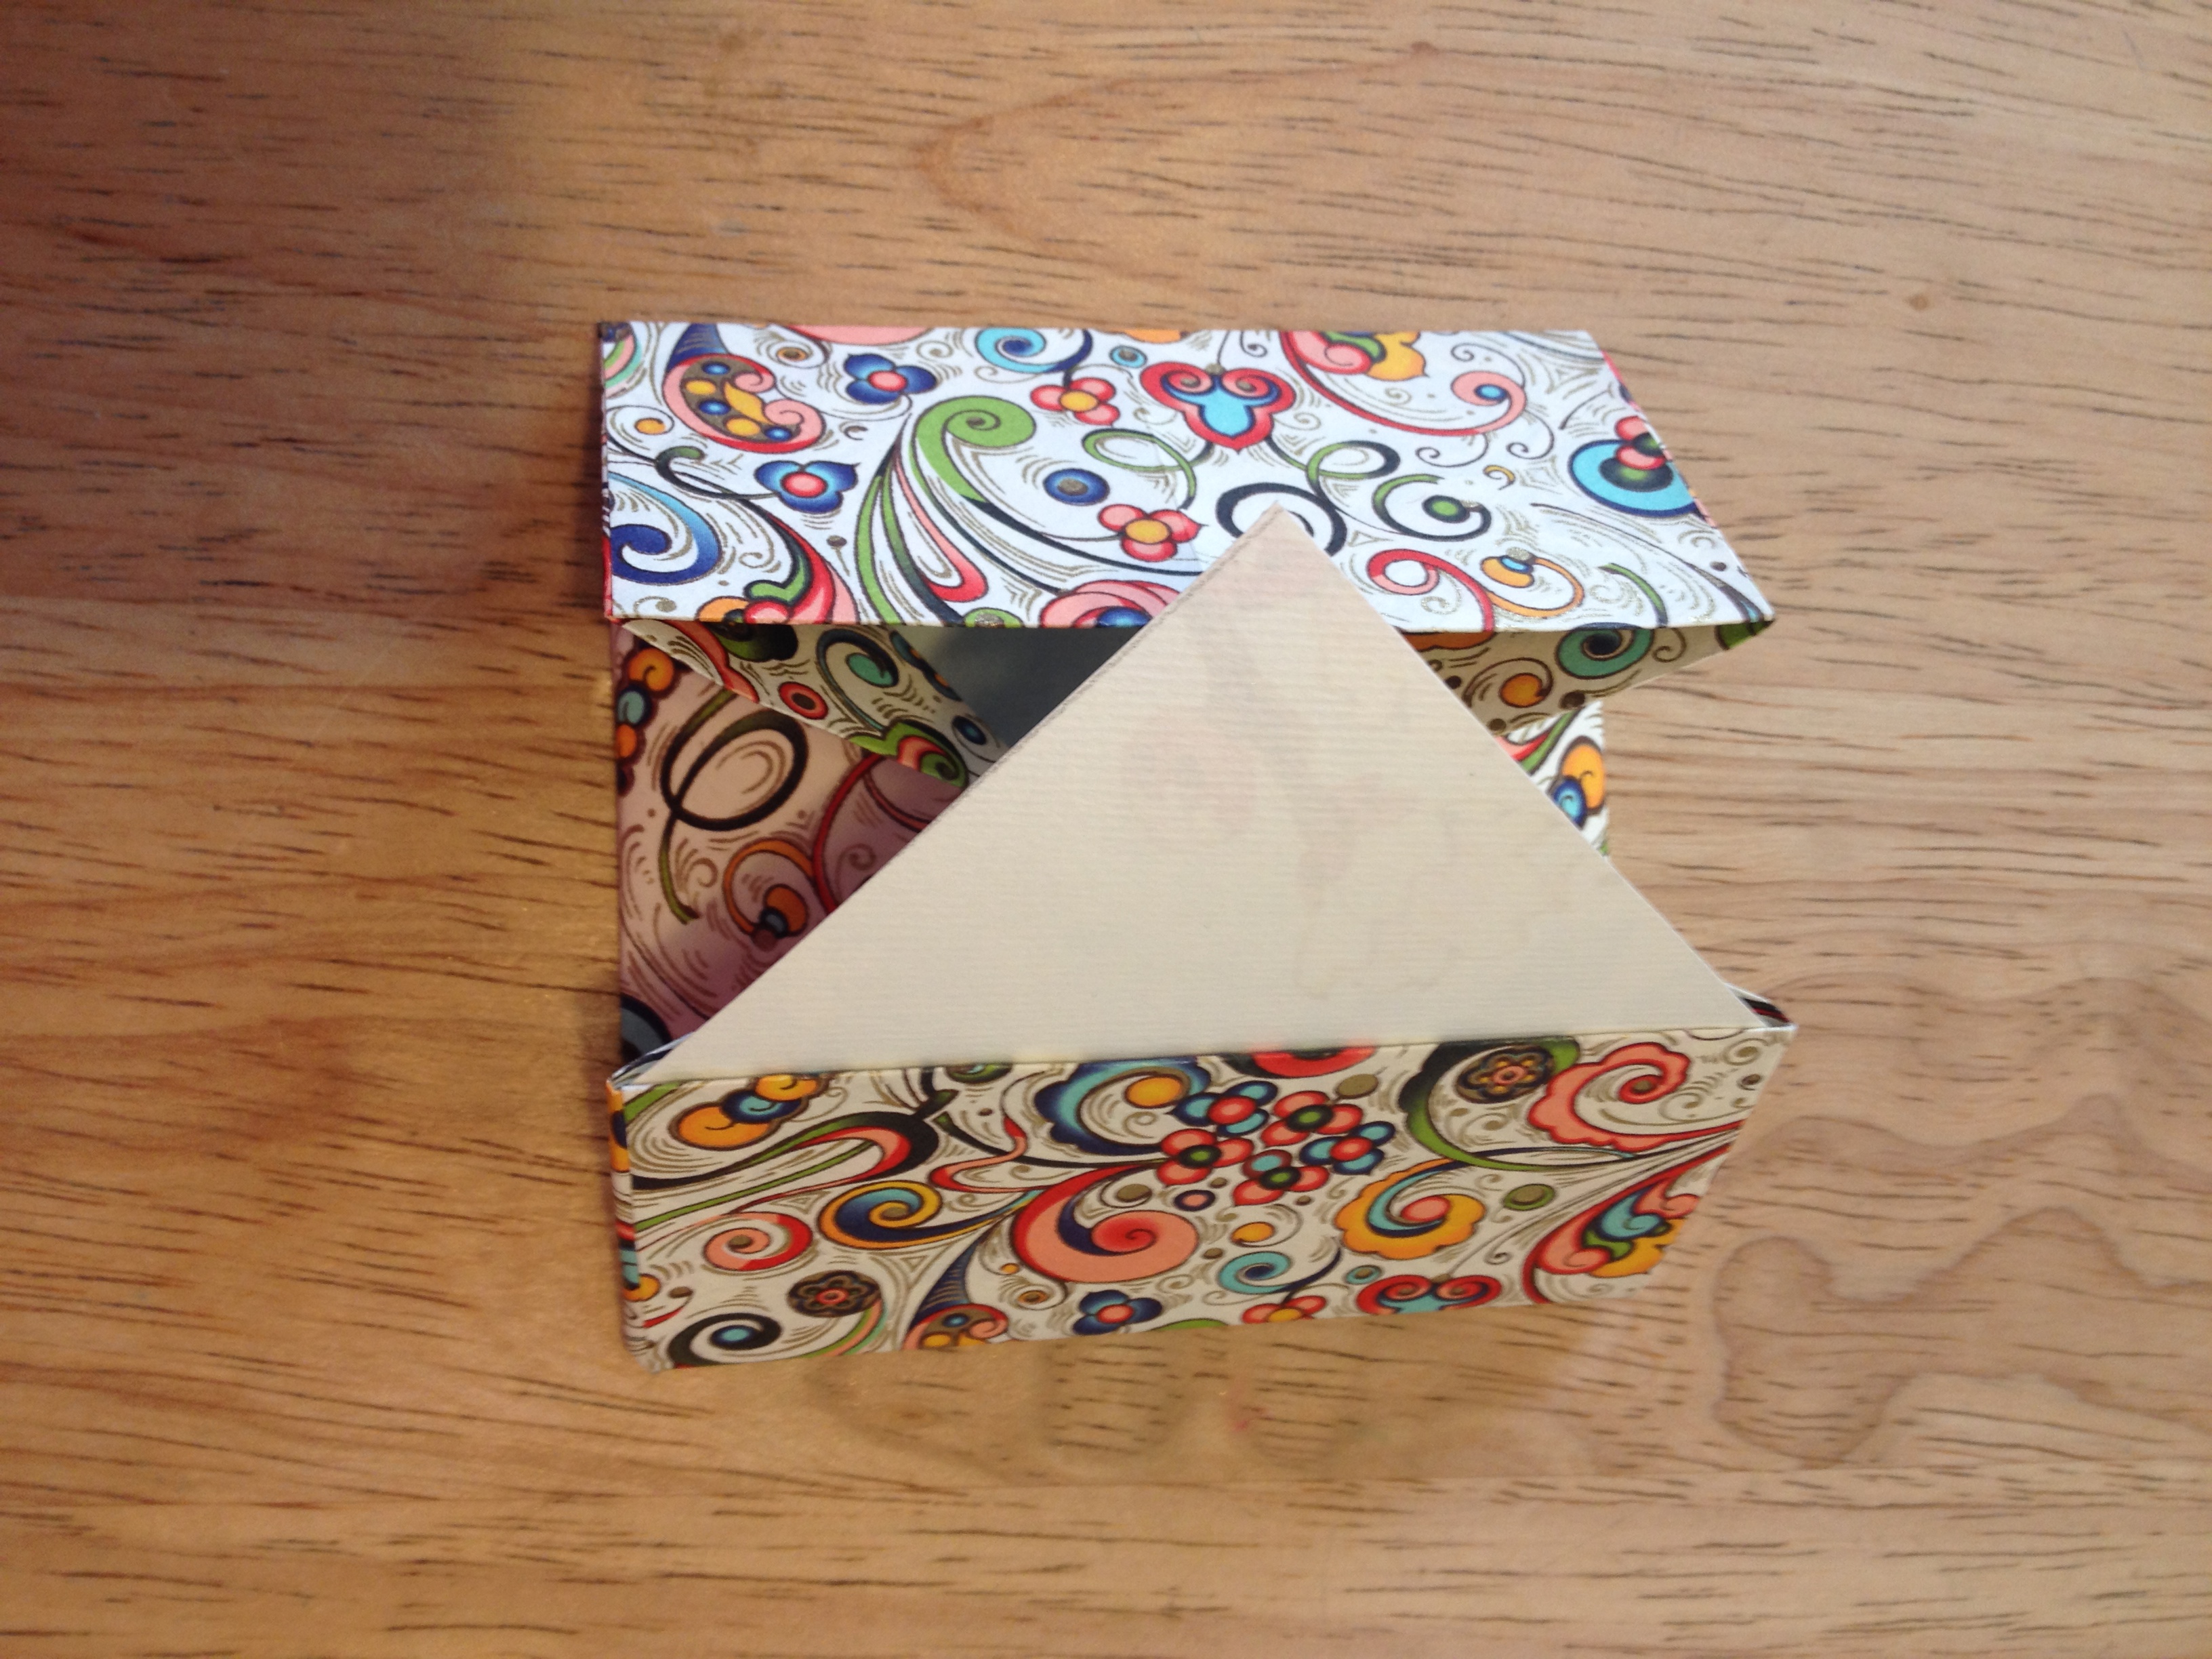
Box with lining inserted
At this point, some versions of the thread book insert a second, larger square box for the next level. I quit at one and proceeded to the base level – a rectangular box. The rectangular box needs to be the same width as the square box, but twice as long. It is possible to fold an origami rectangular box, but when I tried this, I found it was much too bulky to fold flat. Instead, I cut and pasted a box from a single sheet of paper. I know it is a little difficult to see, but the pencil lines indicate where the paper needs to be folded. The walls of the box must be 1/2 the width of the base when folded down. I have included a 1/4″ border around all the walls.

Rectangular box with folding lines marked
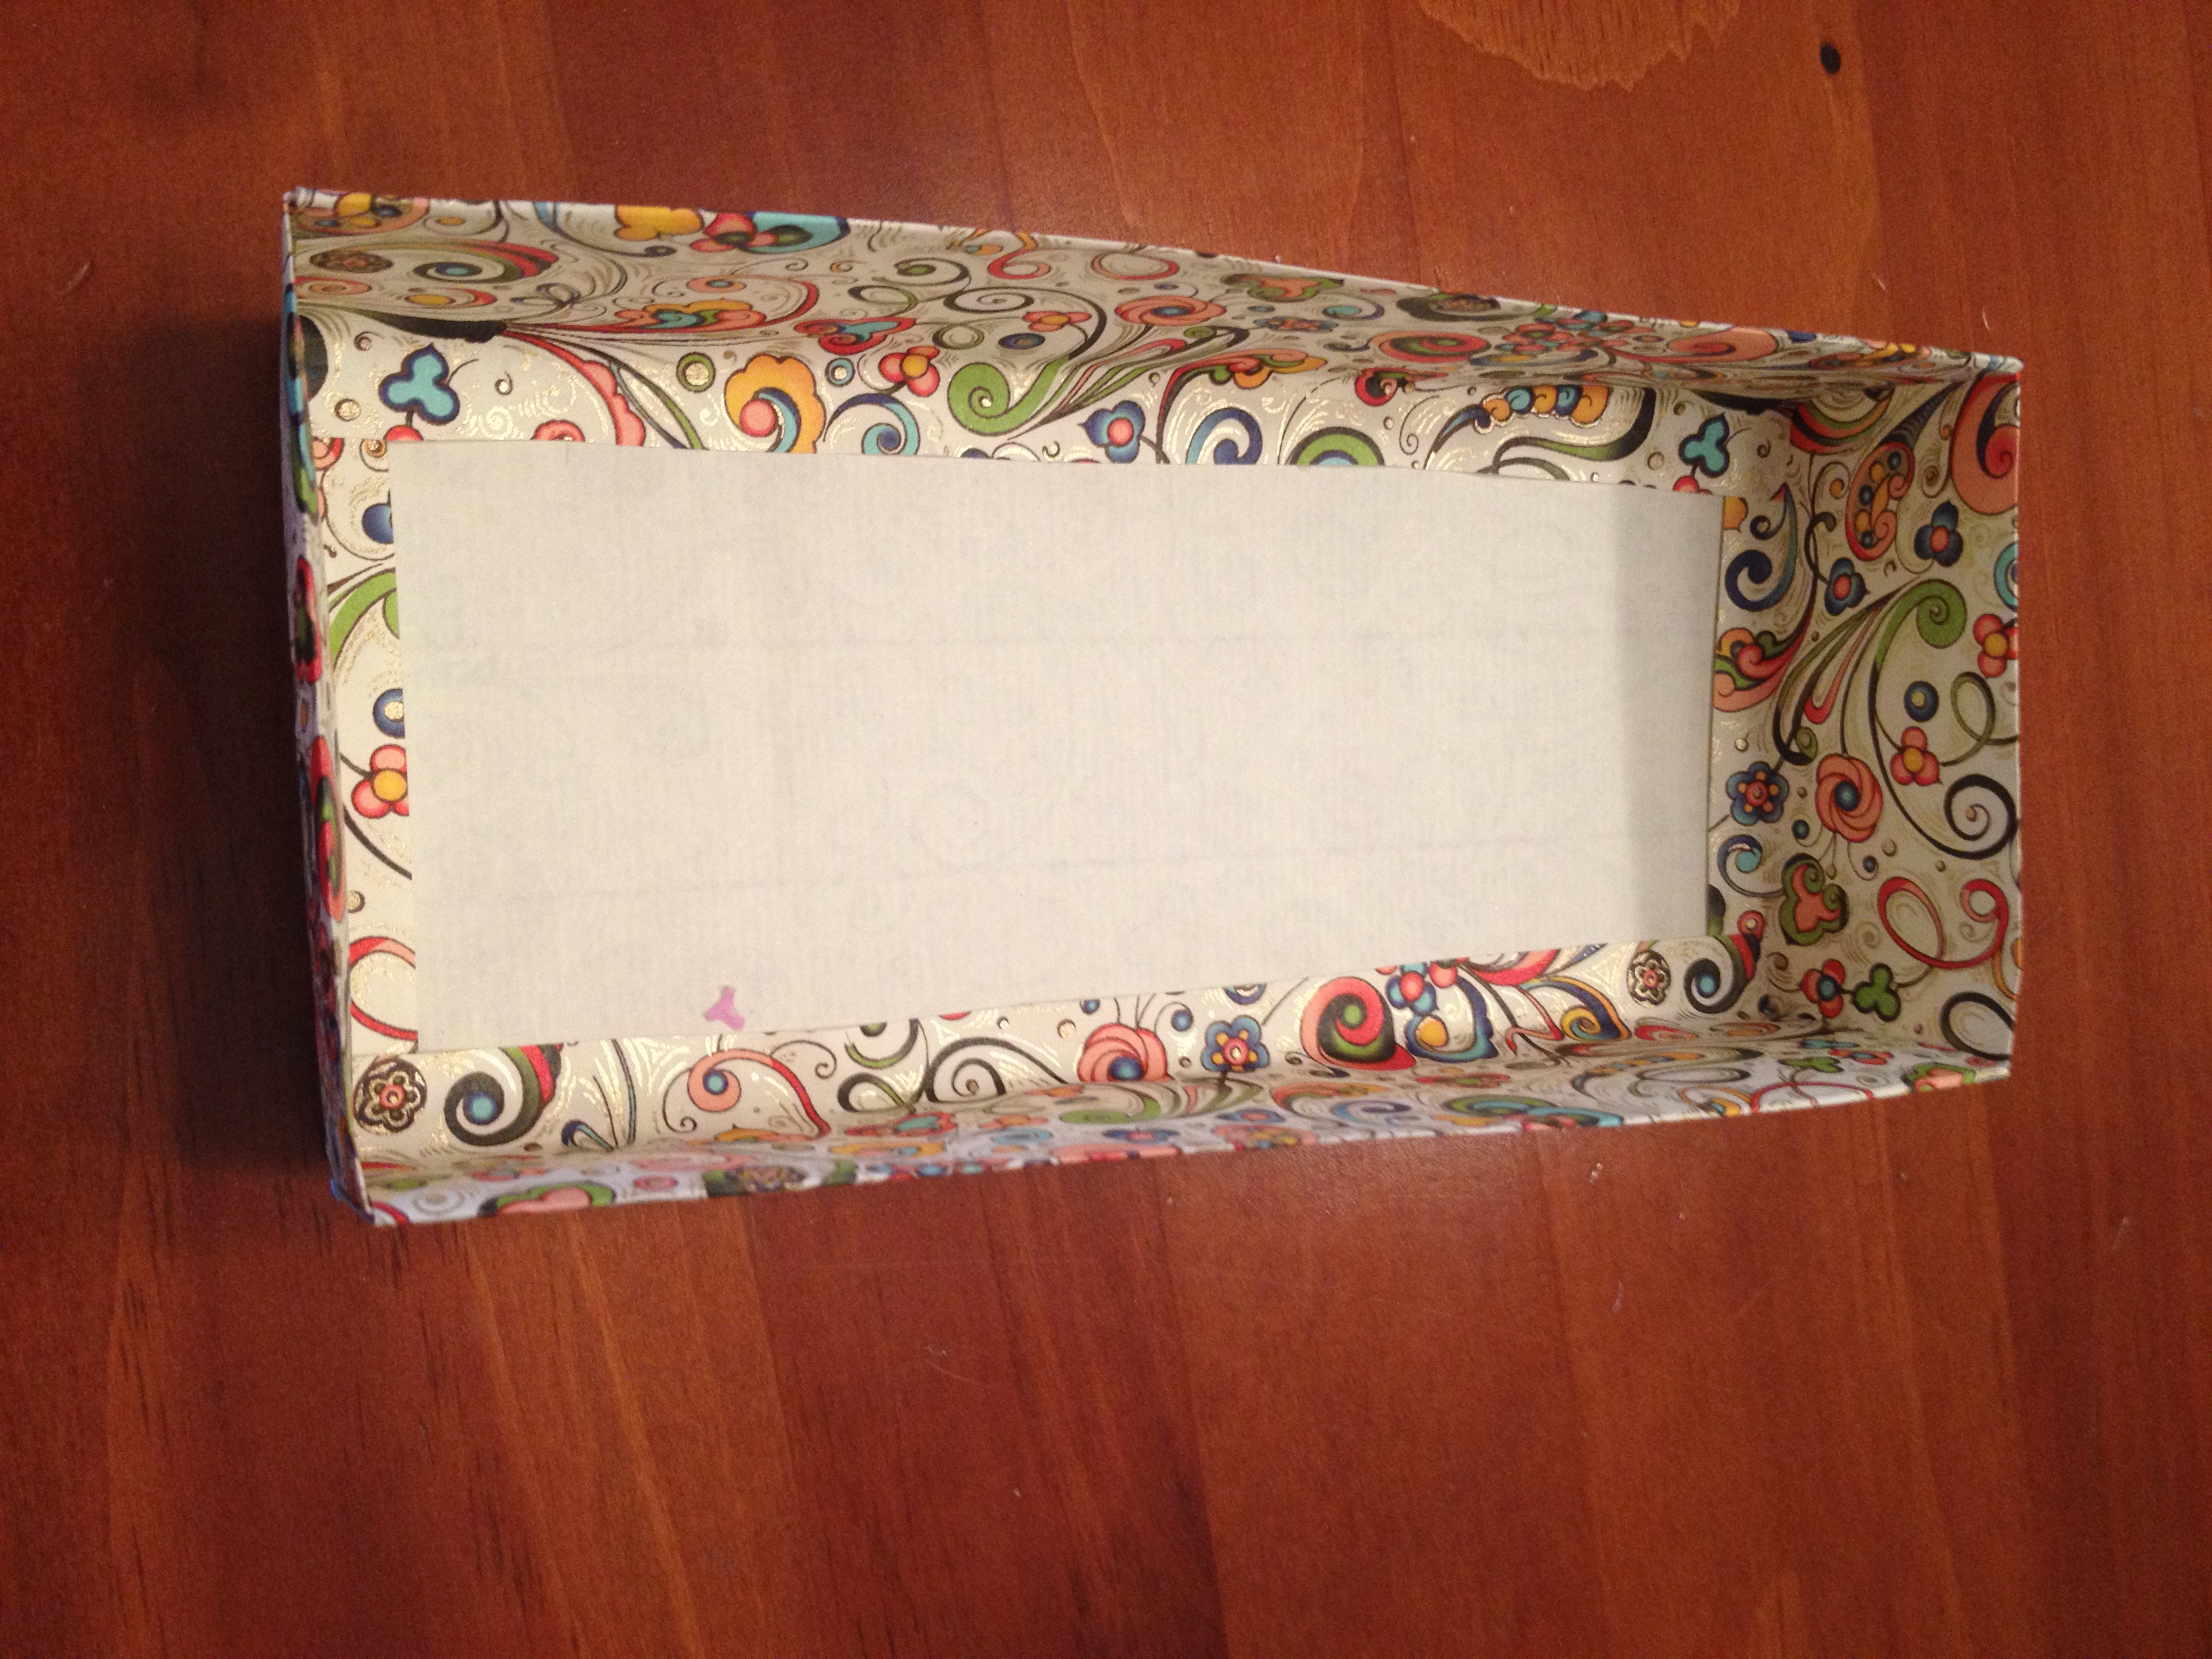
Assembled rectangular box
Make two rectangular boxes fold them flat, and line them just like the square boxes. Finally all the boxes are folded and you are ready to assemble them. You can refer to the photos below. First, attach the magic boxes to the square boxes. This is where the lining flap comes into play. The magic box is turned so it sits like a diamond on top of the square. Be careful not to glue the square box shut. (I have been using an acid free glue stick to assemble my boxes.) Next, attach two of the square box units to each rectangular box, one above the other. At this point, you may want to place your assembled units under a heavy book in order to flatten them while you make a cover. My covers are simple lined rectangles. Include enough space between the box units so the book will fold shut nicely. I also insert a ribbon between the back cover and its lining to use as a closure. Once the cover is ready attach the box units to the inside. Make sure one opens to the left and one to the right. The final pictures show the inside of the book with the boxes open and closed, as well as the closed book from the outside. My cover is made of a piece of marbled silk paper. Regular paper works just fine.

The assembled thread book
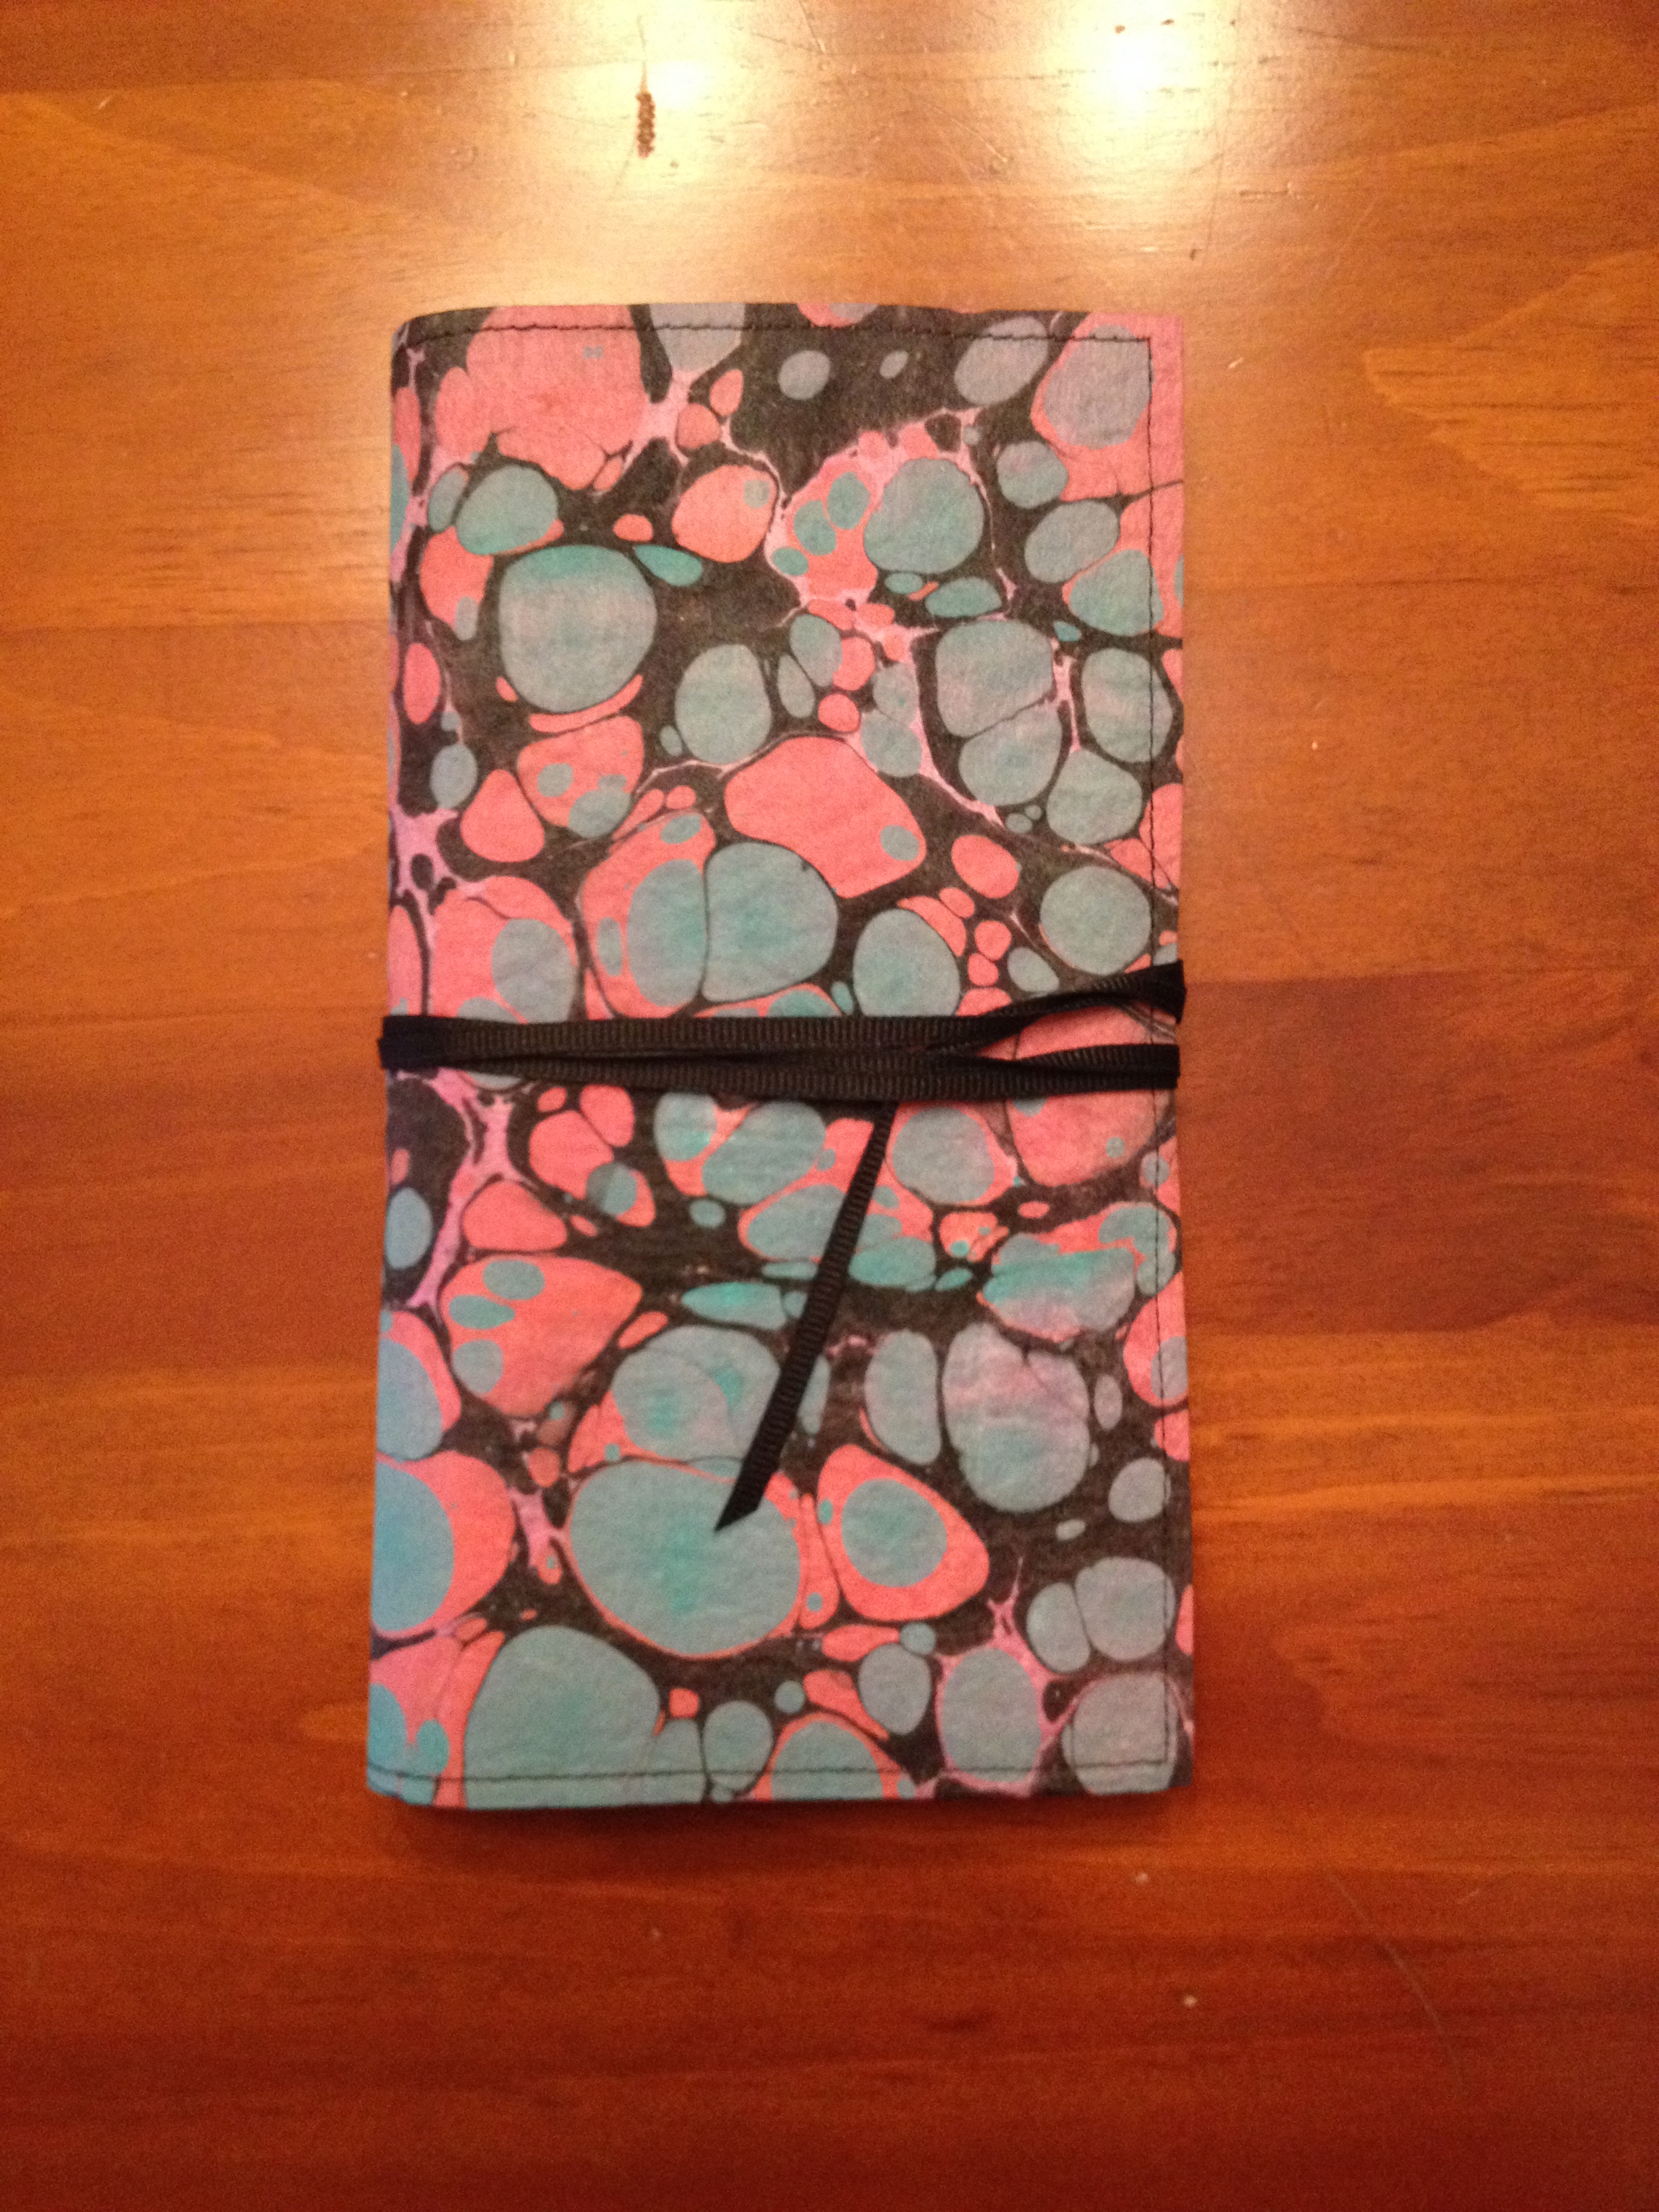
The closed book from the outside
So there you have it! As I said, I make no claims for the authenticity of my version, but I did enjoy working out my solution to the puzzle. Questions about this or any of my other work? Feel free to contact me.
Cabinet of Curiousities
My Cabinet of Curiousities was finished in time for the luncheon and was successfully auctioned for the “Buy it Now” price. If you would like to see the finished piece as well as the other items in the auction, you can check them out here: http://www.crafthouston.org/luncheon-2013-silent-auction/
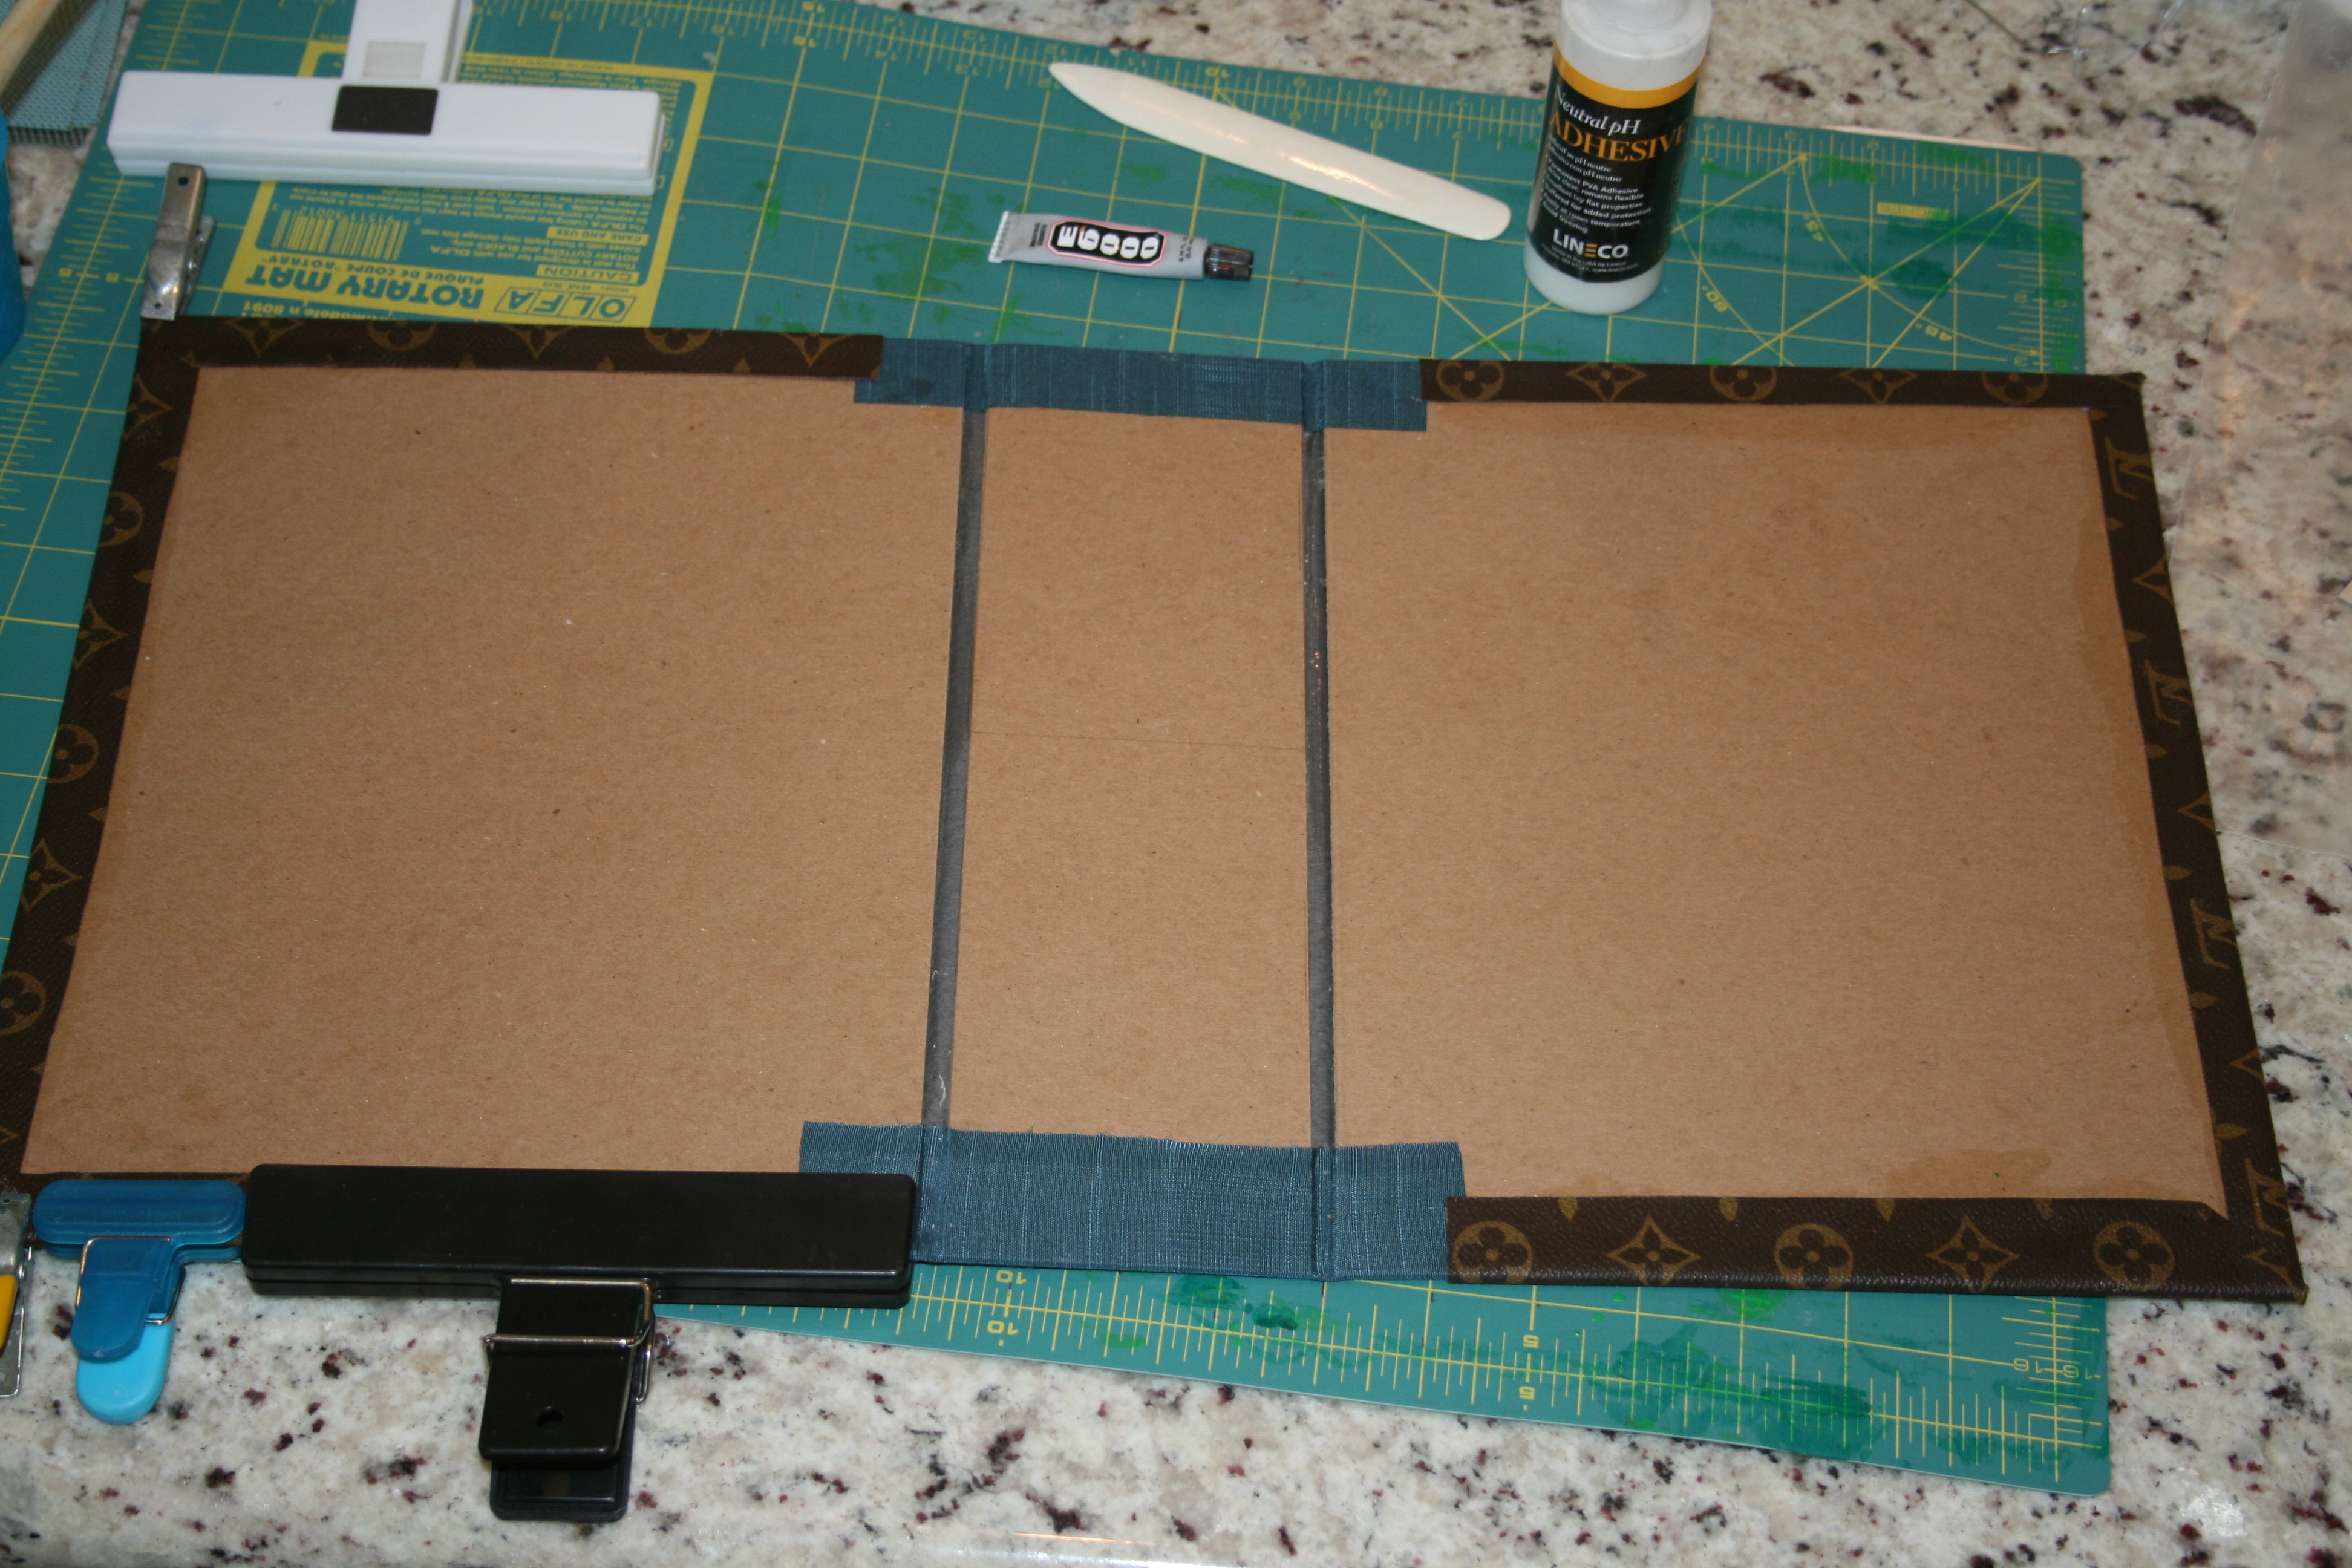
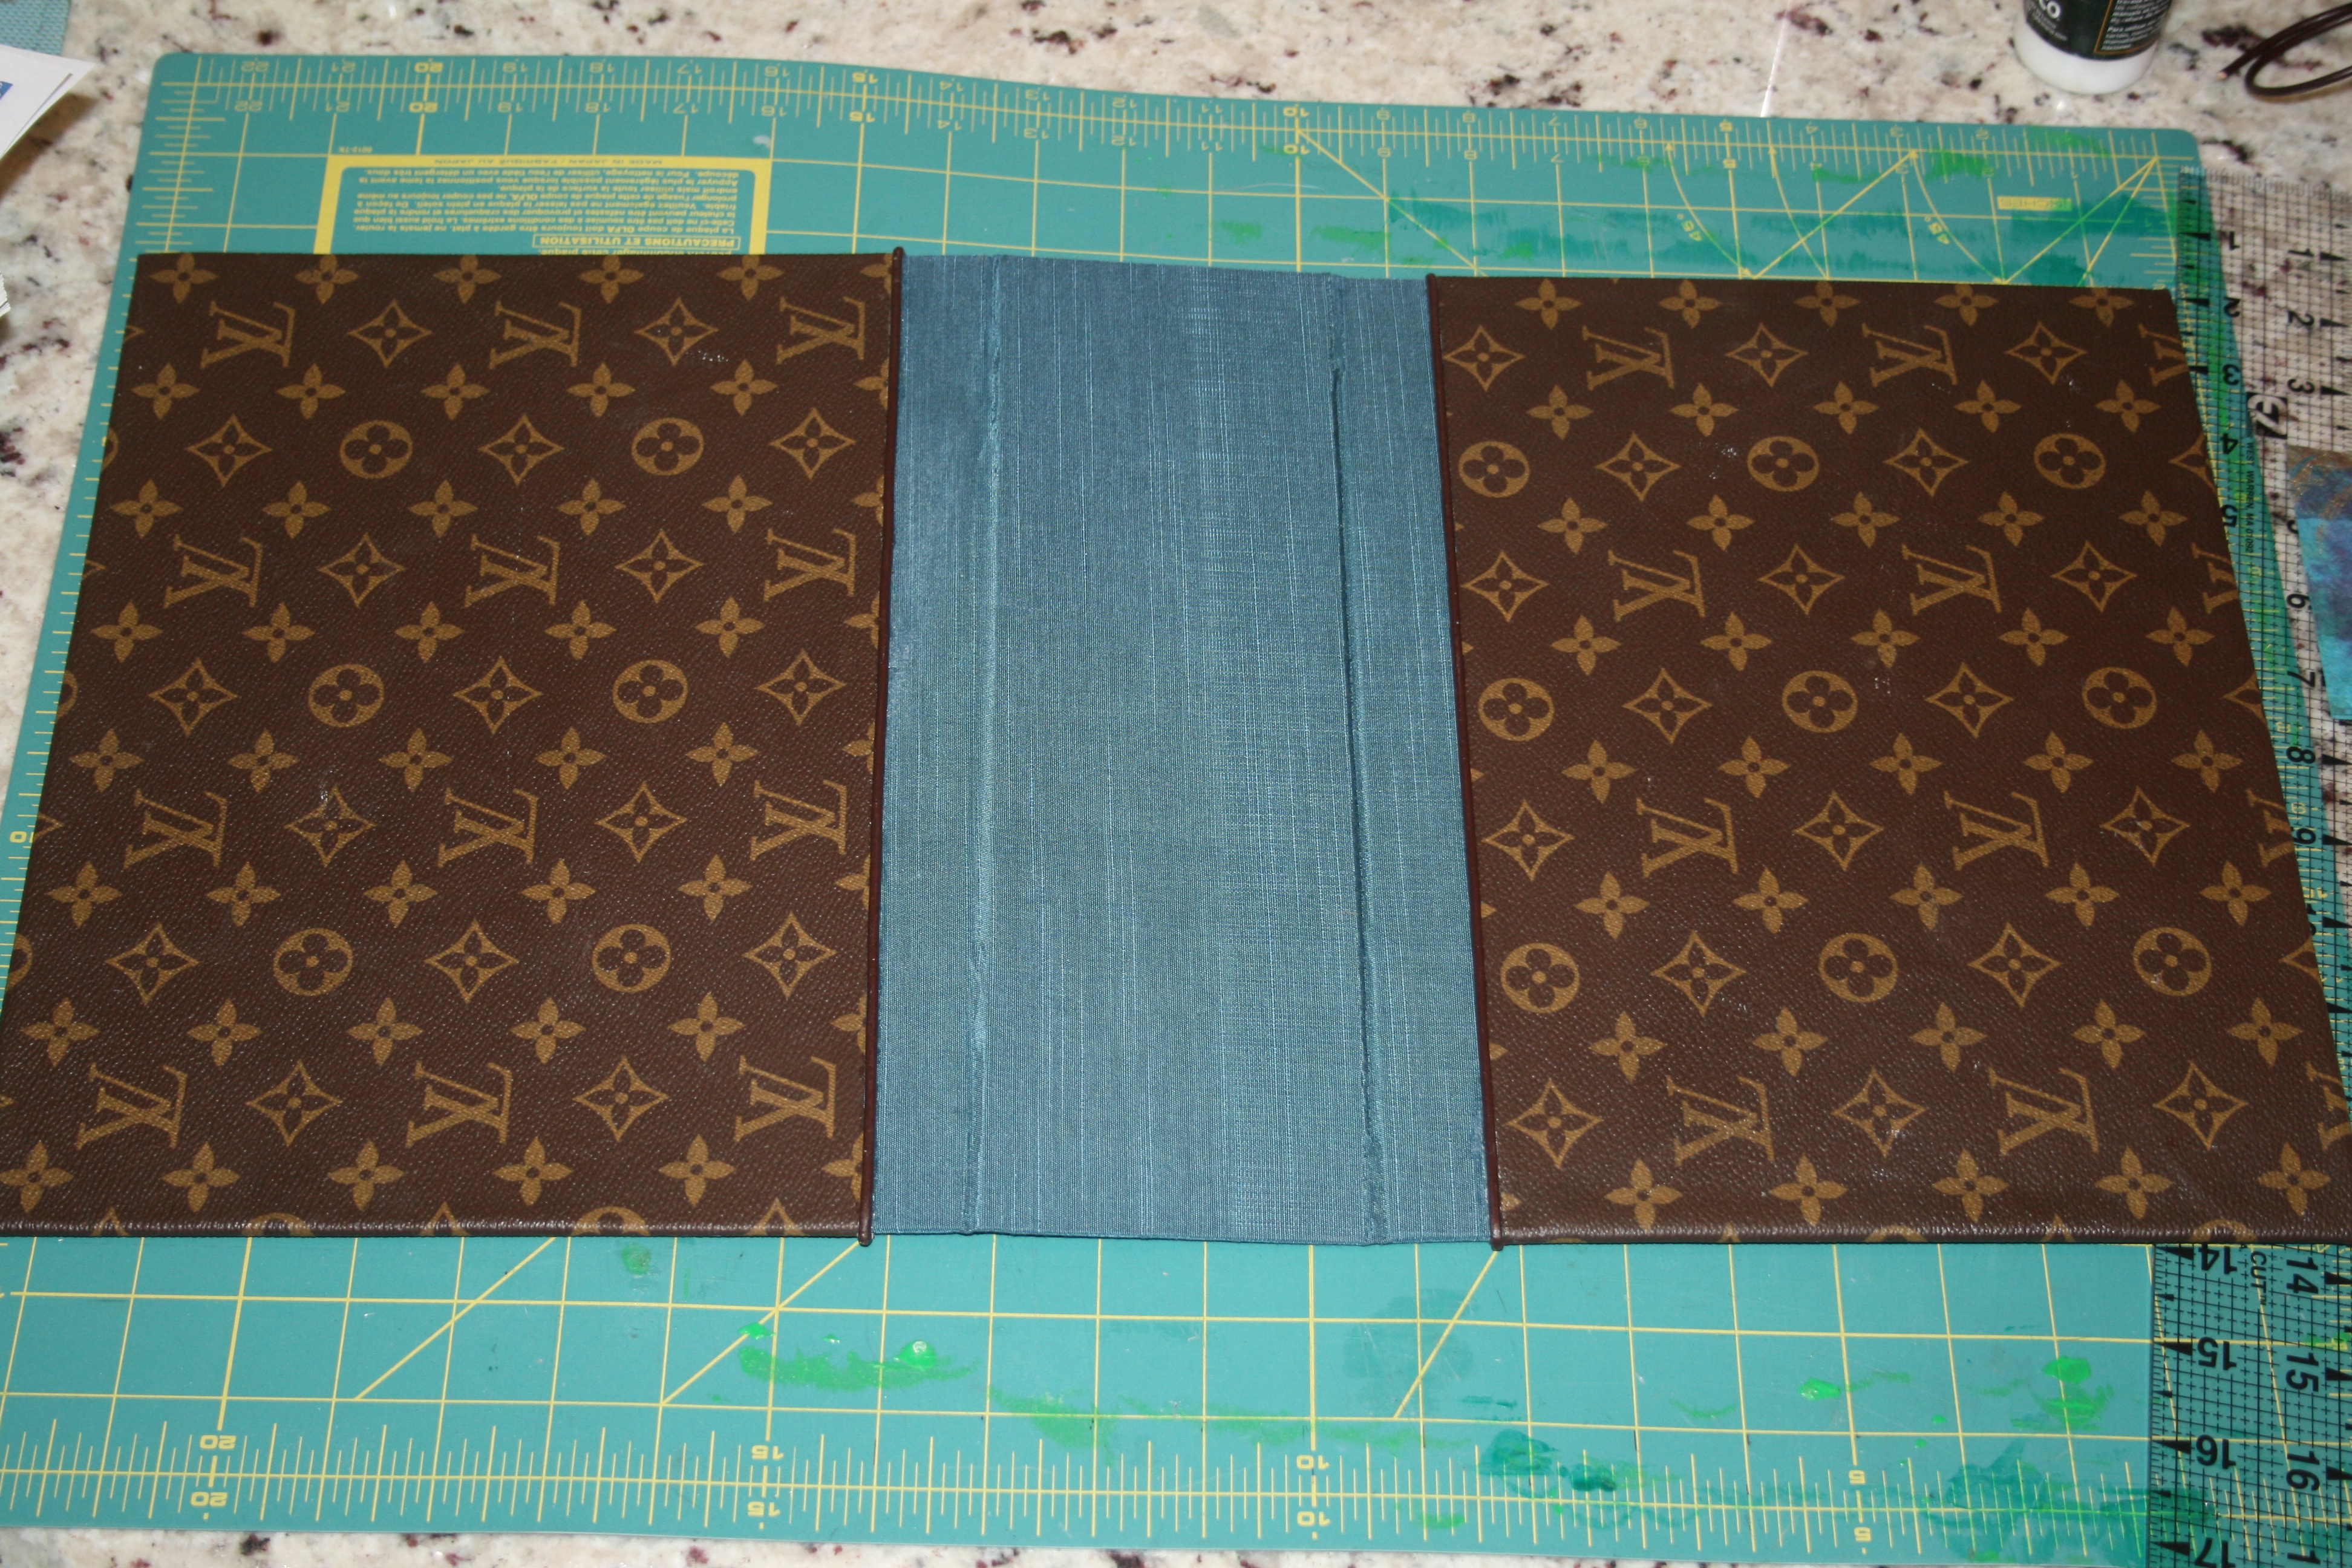
This fabric forms the case of my cabinet. I used book board and book cloth to make the rest of the cover. It’s not easy manipulating such heavy fabric around corners, but an assortment of clips helped me accomplish the task.
Here’s a look at the cover from the other side.
Next up: creating a box for my collection.

You must be logged in to post a comment.